You want to control edge quality when drilling holes in glass because chips, chipping, and rough edges can ruin your work. If you use the right technique, you can safely drill a hole in glass and prevent cracks and chips. Always wear safety goggles to protect your eyes from tiny glass pieces. Glass can crack easily, so you need to handle it carefully. You should work slowly and use tools that fit the job. This helps you avoid cracking and keeps the edges smooth. You can get great results if you follow these tips effectively.
Key Takeaways
- Always wear safety goggles when drilling glass to protect your eyes from shards.
- Use diamond-coated drill bits for clean holes and to minimize chipping.
- Keep the glass cool with water during drilling to prevent cracks.
- Secure the glass with a rubber mat and clamps to avoid movement while drilling.
- Clean the glass before drilling and mark the spot to ensure accuracy.
Tools for Edge Quality in Glass Drilling
When you want to get clean holes in glass, the right tools make all the difference. Aimgrind offers diamond grinding wheels and abrasive tools that help you achieve smooth, chip-free edges. These tools work well for both DIY projects and professional glasswork. You can trust Aimgrind’s experience and quality to help you avoid cracks and rough spots.
Choosing Diamond Drill Bits
You need to pick the right drill bits for glass. Diamond-coated drill bits work best for tempered glass and other brittle materials. They cut cleanly and reduce the risk of chipping. Laboratory tests show that diamond tip bits with an electroplated bond and water cooling give the best results for glass and ceramics.
| Material | Recommended Diamond Bit Type | Bond Type | Cooling |
|---|---|---|---|
| Glass / Ceramic | Diamond Tip Bit | Electroplated | Water |
When you select diamond-coated drill bits, keep these points in mind:
- Diamond drill bits give you high precision and smooth edges.
- They resist heat, which helps when drilling tempered glass.
- You need to use the right coolant and cutting speed to keep the bits in good shape.
- Proper care is important because diamond bits are hard to regrind.
Carbide-tipped drill bits and carbide bits can also work for some glass types, but diamond-coated drill bits are the top choice for edge quality.
Using Drill Press and Support
A drill press helps you control speed and pressure. This control is key when working with tempered glass. You should always support the glass with a rubber mat to prevent slipping and cracking. Use clamps to hold the glass steady, but do not overtighten. Place tape over the drilling spot to keep the drill from wandering and to reduce chipping. Always keep a safe distance from the edge of the glass to avoid cracks.
Here’s a quick checklist:
- Use a drill press for steady drilling.
- Place a rubber mat under the glass.
- Clamp the glass gently.
- Apply tape at the drilling point.
- Keep at least 15 mm from the edge of tempered glass.
Coolant and Lubrication Methods
Heat can cause tempered glass to crack. You need to use coolant and lubrication to keep things cool. Water is the most common coolant for glass drilling. You can also use specialized lubricants for extra protection. Flood cooling works well because it flushes away chips and keeps the drill bit cool. Mist cooling is good for smaller jobs. Air can help clear chips, but it does not provide much lubrication.
| Type of Coolant/Lubricant | Description |
|---|---|
| Air | Cools and clears chips, but not much lubrication. |
| Mist | Low pressure, good for minor heat and chip removal. |
| Flood | Flushes chips and keeps the drill cool, best for edge quality. |
| High Pressure | Removes chips fast, but can break small bits. |
| Minimum Quantity Lubricant | Eco-friendly, uses a fine mist for cooling and lubrication. |
If you use the right coolant and lubrication, you can drill holes in glass without damaging the edges. Always keep the area wet and cool for the best results.
Preparing Glass for Drilling
Getting ready to drill into glass takes a little time, but it makes a big difference in the final result. If you want smooth edges and fewer chips, you need to prepare your glass the right way. Let’s walk through the steps together.
Cleaning and Marking
Start by making sure your glass is spotless. Any dirt, dust, or grease can cause the drill bit to slip or scratch the surface. Here’s a simple way to get your glass ready:
- Spray a glass cleaner on the surface.
- Wipe it down with a lint-free cloth until it shines.
- Double-check for any smudges or fingerprints.
A clean glass surface helps you drill smoothly and keeps the edges looking sharp. Once your glass is clean, use a marker or a piece of tape to mark the exact spot where you want to drill. This step helps you stay accurate and avoid mistakes.
Securing and Supporting Glass
You don’t want your glass to move while you drill. Movement can lead to cracks or rough edges. To keep your glass steady, try these tips:
- Place a rubber mat or some cushioning under the glass. This absorbs vibrations and protects the glass from hard surfaces.
- Use clamps or a vice to hold the glass in place. Don’t overtighten, just enough to keep it from shifting.
- Stabilizing glass clamps work great for this job. They hold the glass securely and help you drill with confidence.
- Wall mount glass clamps are also helpful, especially for thicker glass pieces.
- Before you start, gently shake the setup to check for any movement.
If your glass feels stable, you’re ready for the next step.
Applying Tape for Stability
Tape is your secret weapon when drilling glass. It helps prevent chipping and keeps the drill bit from slipping. Here’s how you can use tape for the best results:
- Stick a piece of masking tape or painter’s tape over the spot where you plan to drill. This gives the drill bit extra grip on the smooth glass.
- For extra protection, you can use duct tape on the inside of a glass tank or container.
- As you drill, lighten the pressure when you get close to breaking through the other side. This reduces the risk of chipping.
Tip: Always keep the area around the hole wet while drilling. This keeps the glass cool and helps you get a cleaner edge.
With these steps, you set yourself up for success. Your glass will stay steady, your edges will look smooth, and you’ll avoid most common mistakes.
How to Drill a Hole in Glass Step by Step
Drilling a hole in glass can feel tricky, but you can control edge quality if you follow the right steps. This step-by-step guide to drill will help you avoid cracks, chips, and rough spots. You will need patience, the right diamond bits, and a steady hand. Let’s break down the process so you can drill a hole in glass effectively every time.
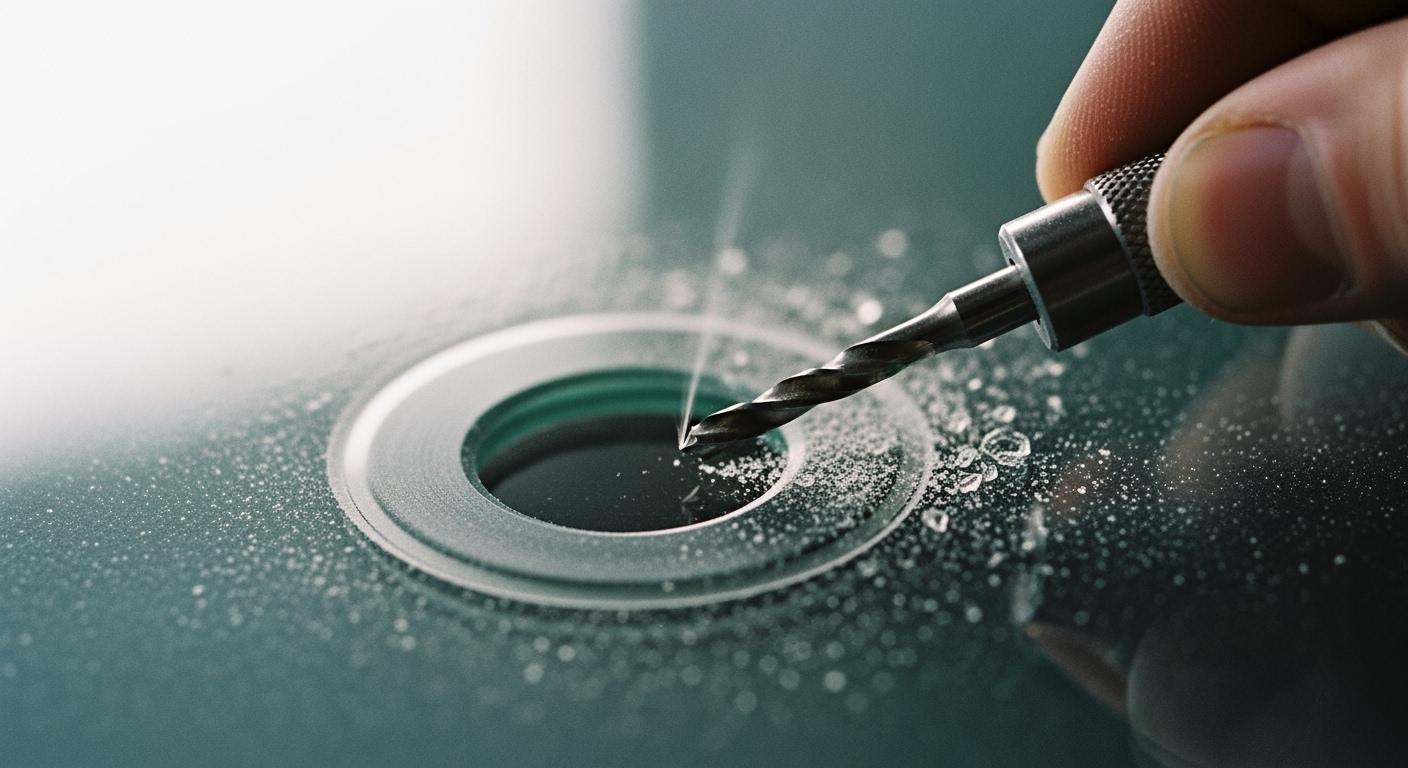
Starting the Hole at an Angle
You want to start the drill at a 45-degree angle. This technique helps you control edge quality and keeps the drill bit from slipping on the smooth glass surface. Place the diamond drill bit on your marked spot. Set your drill to a low speed. Begin drilling at the angle, and let the bit create a small guide indent. Once you see the bit bite into the glass, slowly bring the drill upright so it stands vertical.
Tip: Place painter’s tape in an X shape under the drilling point. This gives extra grip and helps prevent the bit from wandering.
Keep your hand steady. Do not rush. If you start at the wrong angle, the bit can slip, and you might scratch or crack the glass. Always use diamond bits for tempered glass because they cut cleanly and reduce chipping. This first step sets you up for a smooth hole and helps you control edge quality from the very beginning.
Maintaining Pressure and Speed
Now that you have your guide indent, you need to focus on pressure and speed. Set your drill to a very low speed—under 400 RPM works best for most glass. High speed can cause too much heat and make the glass crack or chip. You want to let the weight of the drill do most of the work. Apply gentle, steady pressure. If you push too hard, you risk stress cracks, especially in tempered glass.
Here’s a quick checklist for this step:
- Use low speed to avoid overheating.
- Keep pressure light and even.
- Pause every 15-20 seconds to check your progress.
- Let the drill bit do the cutting—don’t force it.
If you notice the drill slowing down or making a squeaking sound, stop and check for glass dust. Raise the bit, clean away the dust, and continue. This helps you drill a hole in glass effectively and keeps the edges smooth. Remember, drilling through glass takes patience. Rushing can ruin your work.
Using Water as Coolant
Water is your best friend when you drill a hole in glass. It keeps the glass cool and helps you control edge quality. You can use a constant flow of water, a spray bottle, or even submerge the glass in a shallow water bath. The goal is to keep the drill bit and the glass wet at all times.
- Start with a small puddle of water over the drilling spot.
- Keep adding water as you drill.
- If you use a spray bottle, mist the area every few seconds.
- For larger pieces of tempered glass, consider using a water bath for even cooling.
Note: Always pause to remove glass dust and reapply water. This prevents heat buildup and reduces the risk of cracks.
Work slowly and let the drill bit cut at its own pace. If you want to drill a hole all the way through, try drilling halfway from one side, then flip the glass and finish from the other side. This method helps you control edge quality and prevents chipping on the exit side.
Once you finish, you might notice some sharp edges around the hole. You can use Aimgrind diamond grinding wheels to smooth and polish the area. These diamond tools work perfectly for tempered glass and help you achieve a professional finish.
If you follow these steps, you will drill a hole in glass effectively and keep your edges looking clean and safe.
Finishing and Smoothing Drilled Holes
Removing Burrs and Sharp Edges
After you drill a hole in glass, you often find rough spots or sharp edges around the opening. These can cause injuries or make the glass more likely to crack later. You want to smooth these areas right away. Here are some simple ways to remove burrs and sharp edges:
- Use sandpaper, a diamond file, or a glass grinder to gently smooth out the rough spots.
- Wet the sandpaper before you start. This helps keep dust down and makes the process safer.
- Sand the glass with light, downward pressure. Check the edge often to see if it feels smooth.
- Keep working until the edges are no longer sharp or jagged.
Tip: Always work slowly and gently. If you push too hard, you might cause cracking or even chips around the hole.
Safety matters when you handle glass. Take a look at this table for important safety steps:
| Safety Precaution | Description |
|---|---|
| Personal Protective Equipment (PPE) | Wear safety goggles, gloves, and a mask to protect yourself from dust. |
| Ventilation and Dust Extraction | Work in a well-ventilated area and use dust extraction if possible. |
| Hygiene Practices | Wash your hands and face after working with glass and tools. |
| Regular Maintenance and Cleaning | Clean your workspace and tools to keep dust under control. |
| Training and Awareness | Learn about the risks and safe handling of glass and abrasive tools. |
Polishing with Diamond Grinding Wheels
Once you remove the burrs, you want the glass to look polished and professional. Diamond grinding wheels work best for this job. They last longer than regular polishing tools and give you a smoother finish. Start with a coarse diamond wheel to shape the edge, then switch to a finer wheel for a frosted or even mirror-like finish.
Diamond grinding wheels are made for hard materials like glass. They help you avoid cracking and chipping because they grind smoothly and evenly. You can use a grinder head or even a drill with a polishing attachment. Always keep the glass cool with water while you polish. This prevents cracks and helps you get the best results.
Note: If you want a truly smooth edge, take your time and use lighter pressure as you move to finer wheels.
Inspecting for Cracks
After you finish polishing, you need to check the glass for cracks or other problems. Look closely at the hole and the edges. Stress cracks can show up without warning, often starting at the edge. Chips or small imperfections can make the glass weaker and more likely to break later.
- Check for lines or marks that look like cracks near the hole.
- Look for chips or rough spots along the edges.
- Handle the glass carefully to avoid causing new cracks during inspection.
If you spot any cracks or chips, you may need to smooth the area again or even start over with a new piece of glass. Careful inspection helps you catch problems early and keeps your project safe and strong.
Common Drilling Mistakes to Avoid
When you start drilling into glass, it’s easy to make mistakes that can ruin your project. Let’s look at some of the most common errors and how you can avoid them.
Wrong Tools or Speed
Choosing the wrong tools or using the wrong speed can cause big problems. If you use a drill bit that isn’t made for glass, you might see chips or cracks around the hole. You want to pick diamond-coated drill bits because they cut smoothly and help you get a clean edge.
Here are some frequent tool and speed mistakes:
- Using regular metal or wood bits instead of diamond drill bits for glass.
- Setting your drill to a high speed, which can cause overheating and cracks.
- Not supporting the glass, which leads to vibration and chipping.
Drilling at the right speed is important. If you go too fast, you can damage the glass and make the hole rough. The temperature can rise quickly, and that can cause thermal cracks or even break the glass.
Tip: Always use a slow, steady speed and let the drill do the work.
Skipping Preparation
You might feel tempted to skip the setup, but preparation is key. If you don’t clean the glass or mark your spot, the drill can slip. Forgetting to secure the glass can make it move, which leads to uneven holes or even breakage.
- Always clean the glass before drilling.
- Mark the exact spot for your hole.
- Use tape to help the drill bit grip the surface.
- Secure the glass with clamps or a mat.
Taking a few extra minutes to prepare can save you from a ruined piece of glass.
Neglecting Coolant
Drilling creates heat. If you don’t use water or another coolant, the glass can crack from the heat. Some people forget this step and end up with broken glass or rough edges around the hole.
- Keep the drilling area wet at all times.
- Use a spray bottle or a small puddle of water.
- Pause often to add more water and clear away dust.
Remember: Coolant keeps your glass safe and helps you drill a smooth, clean hole.
You can control edge quality when drilling holes in glass by following a few simple steps. Clean and mark your glass, secure it, and use tape for stability. Choose diamond drill bits and keep the area cool with water. Aimgrind diamond grinding wheels help you achieve professional-looking results. If you want to work on advanced or large projects, ask an expert for advice. Take your time and use the right tools. Your glass will look smooth and strong.
FAQ
What type of drill bit should you use for glass?
You should use a diamond-coated drill bit. This type cuts glass smoothly and helps prevent chips and cracks. Regular bits for wood or metal will not work well on glass.
How do you keep glass from cracking while drilling?
Keep the glass cool with water. Drill slowly and use light pressure. Place tape over the drilling spot for extra grip. Support the glass with a mat or clamps.
Can you drill tempered glass at home?
You should not drill tempered glass at home. Tempered glass can shatter without warning. If you need holes in tempered glass, ask a professional or order pre-drilled glass.
How do you smooth the edges after drilling?
Use a diamond grinding wheel or fine sandpaper. Work gently around the hole. Keep the area wet to reduce dust and heat. Aimgrind diamond grinding wheels give you a smooth, polished finish.
