You can achieve smoothness and strength in rail weld joints by using proper grinding techniques and the right tools. High-quality grinding wheels, such as Aimgrind‘s Metal bond grinding wheels, help you create quality welds that last. When you grind a weld, focus on both the surface finish and the integrity of the joint. Good grinding practices ensure top quality and reliable results every time.
Key Takeaways
- Start with thorough cleaning and inspection of the rail surface to identify defects before grinding.
- Choose the right grinding tools, like Aimgrind’s Metal bond grinding wheels, for effective and precise results.
- Balance surface finish and weld integrity by checking for smoothness and full penetration after each grinding step.
- Avoid over-grinding by using light pressure and regularly checking the weld’s thickness to maintain strength.
- Conduct regular inspections and non-destructive testing to ensure the quality and safety of the weld joints.
Weld Joint Preparation
Cleaning and Inspection
You start every weld joint preparation with cleaning. Remove dirt, oil, and rust from the rail surface. Use a wire brush or a grinder for this step. Clean surfaces help you see the joint clearly. Good cleaning also helps you spot weld defects early. After cleaning, move to inspection. Check the joint for cracks or uneven surfaces. Inspection helps you find problems before you begin grinding. You want to make sure the edge preparation is smooth and free from debris. This step sets the stage for proper fit-up and strong welds.
Identifying Defects
You need to look for common weld defects during preparation. These defects can weaken the joint if you do not address them. During inspection, you may find:
- Vertical wear
- Side wear
- Rail corrugation
- Contact fatigue wear (spalling, shelling, cracking)
- Plastic flow
You must check each weld joint for these issues. Edge preparation helps you see these defects more easily. If you find any weld defects, mark them for repair. Proper fit-up and edge preparation reduce the risk of new defects forming during grinding.
Marking Areas for Grinding
You should mark the areas that need grinding before you start. Use chalk or a marker to outline the weld defects and uneven spots. This step helps you focus on the right places. Marking ensures you do not miss any part of the joint that needs attention. Good preparation means you know exactly where to grind. Edge preparation and proper fit-up make this process easier. When you mark the weld joint, you set yourself up for a smooth and strong finish.
Selecting Grinding Tools
Choosing Abrasives
You need to pick the right abrasive for rail weld joints. The abrasive you choose affects both the smoothness and the strength of the weld. Metal bond grinding wheels from Aimgrind work well for this job. These wheels use diamond or CBN abrasives. They can handle hard rail materials and keep their shape during tough tasks. You get a longer service life and fewer wheel changes. This means you spend less time on maintenance and more time on the job.
Tip: Metal bond wheels perform well on interrupted cuts and keep the original rail profile. This helps you maintain the correct shape and strength of the weld joint.
Here is a table to help you select the right grinding tool:
| Criteria | Description |
|---|---|
| Type of Rail | Some rails need special tools for best results. |
| Operational Demands | Choose tools that match how the rail will be used. |
| Surface Roughness Requirements | Aim for less than 10 μm Ra for smooth finishes. |
| Profile Accuracy | Match the tool to the rail’s target contour. |
| Metal Removal | Remove at least 0.02 mm per pass for good results. |
Tool Matching for Weld Joints
You must match your grinding tool to the weld joint. Aimgrind’s Metal bond grinding wheels give you several advantages. They last longer than resin or vitrified wheels. They keep their shape, which is important for high-precision rail work. You can use them on hard materials without losing accuracy. When you use the right tool, you get a strong, smooth weld joint that meets industry standards.
If you want to learn more about Aimgrind’s grinding solutions, visit their official website.
Grinding Process for Smoothness
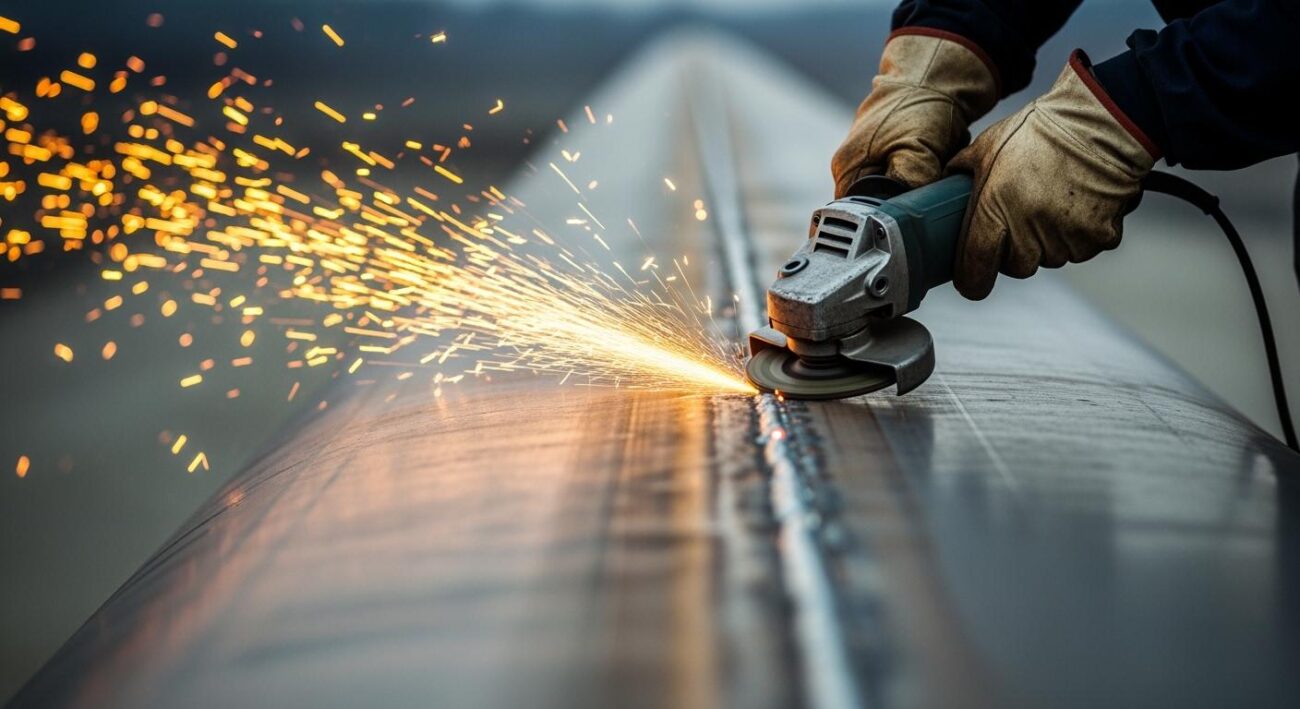
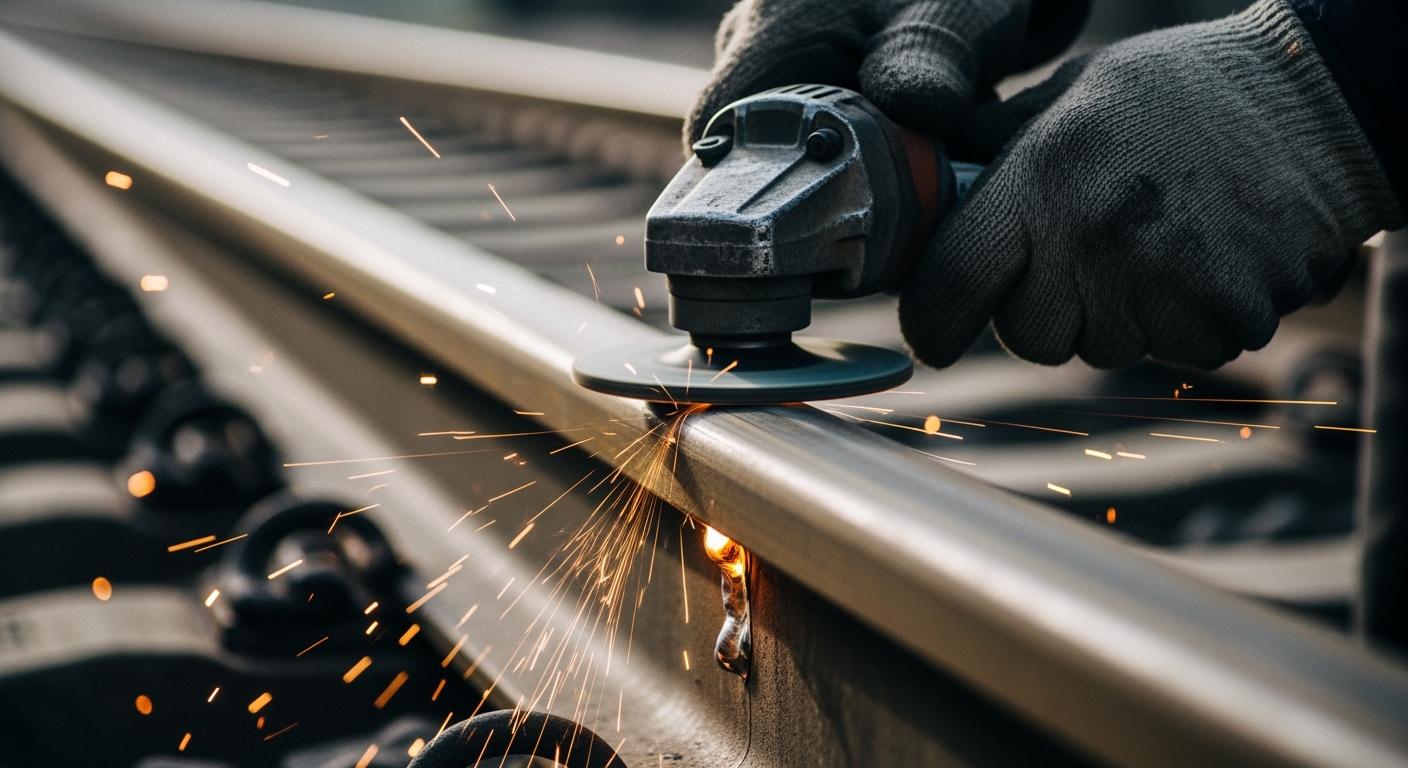
Initial Grinding Steps
You begin the grinding process by removing excess weld material. Use a high-quality grinding wheel, such as Aimgrind’s Metal bond grinding wheels, to shape the weld. Hold the grinder steady and move it along the weld joint. Keep your movements slow and controlled. This helps you avoid gouging the rail or creating uneven spots. Check your progress often. Look for high points and low spots on the weld. Remove only as much material as needed to bring the weld close to the rail profile. This step sets the foundation for a strong and smooth finish.
Tip: Always wear safety gear when you use grinding tools. Safety glasses, gloves, and hearing protection keep you safe during the grinding process.
Flap Wheel Finishing
After you complete the initial grinding, switch to a flap wheel for finishing. Flap wheels play a key role in post-weld grinding. They help you blend the weld seam into the surrounding metal. This step is important for both the strength and the appearance of the rail joint. You use the flap wheel to smooth out any rough edges left from the first grinding pass. The flap wheel also helps you achieve a smooth transition between the weld and the base metal.
- Flap wheels are essential for grinding and blending weld seams.
- They help achieve a smooth transition between the weld and surrounding metal.
- This process is crucial for maintaining both the integrity and appearance of rail weld joints.
Move the flap wheel gently over the weld area. Do not press too hard. Let the tool do the work. This method helps you avoid removing too much material and keeps the weld strong.
Achieving Uniform Surface
You want the rail surface to look and feel even after grinding. Use careful grinding methods to check your work as you go. Run your hand or a straight edge along the weld joint. Look for any bumps or dips. If you find uneven spots, use the grinder or flap wheel to correct them. Aim for a uniform surface that matches the original rail profile. A smooth finish reduces the risk of future rail problems and keeps trains running safely.
Note: Consistent post-weld grinding helps you maintain both the strength and the appearance of the rail. Always check your work before moving to the next step.
When you follow these steps, you create a weld joint that is both strong and smooth. You also make sure the rail meets industry standards for safety and performance.
Achieving Smoothness and Strength
Balancing Surface Finish and Weld Integrity
You need to focus on both smoothness and strength when you grind a rail weld joint. If you want quality welds, you must make sure the joint has a high quality surface finish and good mechanical strength. A smooth surface helps trains move safely and reduces wear. At the same time, you must keep the weld strong so it can handle heavy loads.
You should check the weld after each grinding step. Look for any gaps or uneven spots. Gaps can weaken the joint and lower weld strength. You want to avoid these problems by keeping the weld even and well-blended with the rail. Use your hand or a straight edge to feel for bumps. If you find any, grind them down gently.
Tip: Always check for full penetration in the weld. Full penetration means the weld metal goes all the way through the joint. This gives you good mechanical strength and prevents gaps that can cause cracks later.
A good weld joint has both a smooth surface and strong penetration. You should aim for a stronger surface that matches the original rail profile. This balance helps you get both safety and long-lasting performance.
Here is a simple checklist to help you balance surface finish and weld integrity:
- Check for smoothness after each grinding pass.
- Inspect the joint for gaps or cracks.
- Confirm full penetration in the weld.
- Test the joint for good mechanical strength.
- Make sure the weld blends with the rail.
Preventing Over-Grinding
You must avoid removing too much material from the weld joint. Over-grinding can lower weld strength and create gaps. If you grind too much, you may reduce the thickness of the weld. This can lead to weak spots and poor mechanical performance.
To prevent over-grinding, follow these steps:
- Use light pressure when grinding.
- Check the joint often for thickness and penetration.
- Stop grinding as soon as the weld matches the rail profile.
- Avoid grinding into the base rail metal.
Note: Over-grinding can cause loss of penetration and create gaps in the joint. These gaps can lower the mechanical strength and make the weld unsafe.
You should always aim for a balance. Remove just enough material to get a smooth finish, but keep the weld strong. This approach helps you achieve smoothness and strength in every weld joint. When you follow these steps, you get a joint with good mechanical strength and no gaps. You also help prevent future rail problems and keep the track safe.
Verifying Weld Strength
In-Process Checks
You need to check the strength of the rail weld joint while you grind. Inspection during the process helps you catch problems early. You can use several tests to make sure the weld is strong and safe. Hardness testing lets you see if the weld has the right quality. Macrostructure tests help you find hidden flaws inside the joint. Heat treatment assessment shows if the weld has the correct hardness profile. Long-term safety assessment supports the rail’s performance over time.
Here is a table that shows common in-process checks:
| Test Type | Purpose |
|---|---|
| Hardness Testing | Verifying weld quality |
| Macrostructure Tests | Detecting potential internal flaws |
| Heat Treatment Assessment | Confirming proper heat treatment and hardness profiles |
| Long-term Safety Assessment | Supporting long-term rail safety and performance |
You should perform inspection after each grinding step. You can use tools like hardness testers or visual inspection methods. If you find any issues, you need to fix them before moving forward. Inspection helps you avoid weak spots and keeps the rail safe for trains.
Tip: Regular inspection during grinding prevents mistakes and ensures the weld meets industry standards.
Heat and Material Monitoring
You must monitor heat and material during grinding. High heat can change the properties of the weld. If the weld gets too hot, it may lose strength. You should check the temperature often. Use a heat gun or temperature stickers to track heat levels. Inspection of the material helps you see if the weld stays strong. You can look for signs of overheating, such as discoloration or cracks.
You need to keep the grinding process steady. Avoid grinding too fast or pressing too hard. This keeps the weld cool and strong. Inspection of the rail after grinding helps you confirm that the weld has not changed shape or lost strength. You can use visual inspection or hardness testing for this step.
Note: Careful heat and material monitoring during grinding protects the weld and keeps the rail safe.
Optimizing Weld Joint Design
Design Considerations for Strength
You need to focus on several important factors when you plan weld joint design. The right design helps you get the most strength from each joint. You should look at the materials you use, the shape of the joint, and the steps you take after welding. Each part of the design process affects how strong and safe the rail will be.
Here is a table that shows the most important design considerations for strength:
| Design Consideration | Description |
|---|---|
| Material Composition | Using the right alloy mix improves weldability and joint strength. |
| Joint Design | The shape and layout of the joint help spread loads and increase strength. |
| Quality Control Measures | Testing and checking the weld make sure you find defects and keep the joint strong. |
| Post-Welding Processes | Heat and mechanical treatments after welding boost strength and durability. |
You should always choose a design that matches the rail’s needs. Good weld joint design helps you avoid weak spots and keeps the rail safe for heavy loads. You can use non-destructive testing to check the weld and confirm the strength of the joint. When you follow these steps, you build a rail that lasts longer and works better.
Impact of Grinding on Joint Design
Grinding plays a big role in how well your weld joint design works. You use grinding to shape the joint and remove extra material. If you grind the joint the right way, you keep the design strong and smooth. Grinding helps you match the joint to the rail profile, which is important for safety and performance.
Remember: Careful grinding protects the strength of the weld and keeps the joint in good shape.
If you grind too much, you can weaken the joint and change the design. You should always check the joint after grinding to make sure it still fits the original design. Good grinding practices help you keep the strength and safety of the rail. When you pay attention to both design and grinding, you get the best results for every weld joint.
Troubleshooting and Quality Assurance
Avoiding Common Mistakes
You can prevent many problems during rail weld joint grinding by watching for common mistakes. If you skip proper surface preparation, contaminants can stay on the joint and cause weak welds. Always clean the area before you start grinding. Using the wrong heat settings can also create weak spots. Make sure you use the correct heat for the material. If you do not pay attention to joint design and fit-up, you may see misalignment or poor fusion. Use clamps to keep the joint in place. Lack of penetration and fusion leads to weak welds. Check for full penetration as you work. Skipping post-weld inspection and testing can hide defects. Always inspect the joint and perform tests to remedy any defects.
- Skipping proper surface preparation
- Incorrect heat settings
- Neglecting joint design and fit-up
- Lack of penetration and fusion
- Skipping post-weld inspection and testing
Tip: Careful preparation and regular checks help you avoid most defects and keep the joint strong.
Final Inspection
You need to inspect the joint after grinding to ensure quality. Look for visible defects like cracks, misalignment, or uneven surfaces. Use a straight edge to check for smoothness. If you find any defects, solving defects with grinding can help you fix the problem. You should also check the weld for proper blending with the rail. Aimgrind recommends regular inspection and maintenance, especially at hot spots like joints and welds. Make sure bolts are tight and drainage is good around the joint. Prepare areas near lubricators for grinding to cover all surfaces. Use technology to monitor and collect data for better maintenance decisions.
Non-Destructive Testing
You can use non-destructive testing to find hidden defects in the joint. These tests help you check the quality of the weld without causing damage. Here are some common methods:
| Method | Description |
|---|---|
| Visual Inspection (VT) | Check the weld for visible defects like cracks and misalignment. |
| Radiographic Testing (RT) | Use X-rays or gamma rays to see inside the weld and find hidden flaws. |
| Ultrasonic Testing (UT) | Use sound waves to detect internal defects by measuring reflections. |
| Magnetic Particle Testing (MPT) | Find surface and near-surface defects in magnetic materials using a magnetic field. |
| Dye Penetrant Testing (DPT) | Apply a dye to reveal surface-breaking defects under ultraviolet light. |
| Eddy Current Testing (ECT) | Use electromagnetic induction to find cracks and surface defects in conductive materials. |
Note: Aimgrind’s service process includes thorough inspections and preventive grinding programs to improve rail longevity and quality. Regular checks and testing help you keep every joint safe and strong.
You can achieve smoothness and strength in rail weld joints by following these steps:
- Prepare and align rail ends with care.
- Use proper molding and preheating techniques.
- Control cooling and finish by grinding to match the rail profile.
Managing heat and stresses during welding improves toughness and prevents brittle spots.
- Aimgrind’s Metal bond grinding wheels help you remove defects and create smooth surfaces, which reduces corrosion and improves fatigue performance.
- Create a checklist for technicians and encourage ongoing training, such as the Certified Welding Supervisor Program and Railroad Endorsement.
| Aspect | Tolerance |
|---|---|
| Weld straightness | 0.8–1 mm |
| Flatness tolerance | Rail top: 0.1-0.4 mm |
| Rail temperature | Below 300 °C |
Following best practices in grinding extends rail life and lowers maintenance costs.
FAQ
What makes Aimgrind’s Metal bond grinding wheels suitable for rail weld joints?
You get high wear resistance and thermal stability with Aimgrind’s Metal bond grinding wheels. These wheels keep their shape and last longer. You can grind hard rail materials with precision and efficiency.
How do you avoid over-grinding a rail weld joint?
You should use light pressure and check the weld often. Stop grinding when the weld matches the rail profile. Over-grinding can weaken the joint and cause safety issues.
Why is regular inspection important during grinding?
Regular inspection helps you find defects early. You can fix problems before they affect weld strength. This keeps the rail joint safe and reliable.
Can you use Aimgrind’s Metal bond grinding wheels on other materials?
Yes, you can use these wheels on hard alloys, ceramics, and superhard materials. They work well in many industries, including aerospace and tool manufacturing.
Contact Us
For More Grinding Solution or Customized Abrasive Tools