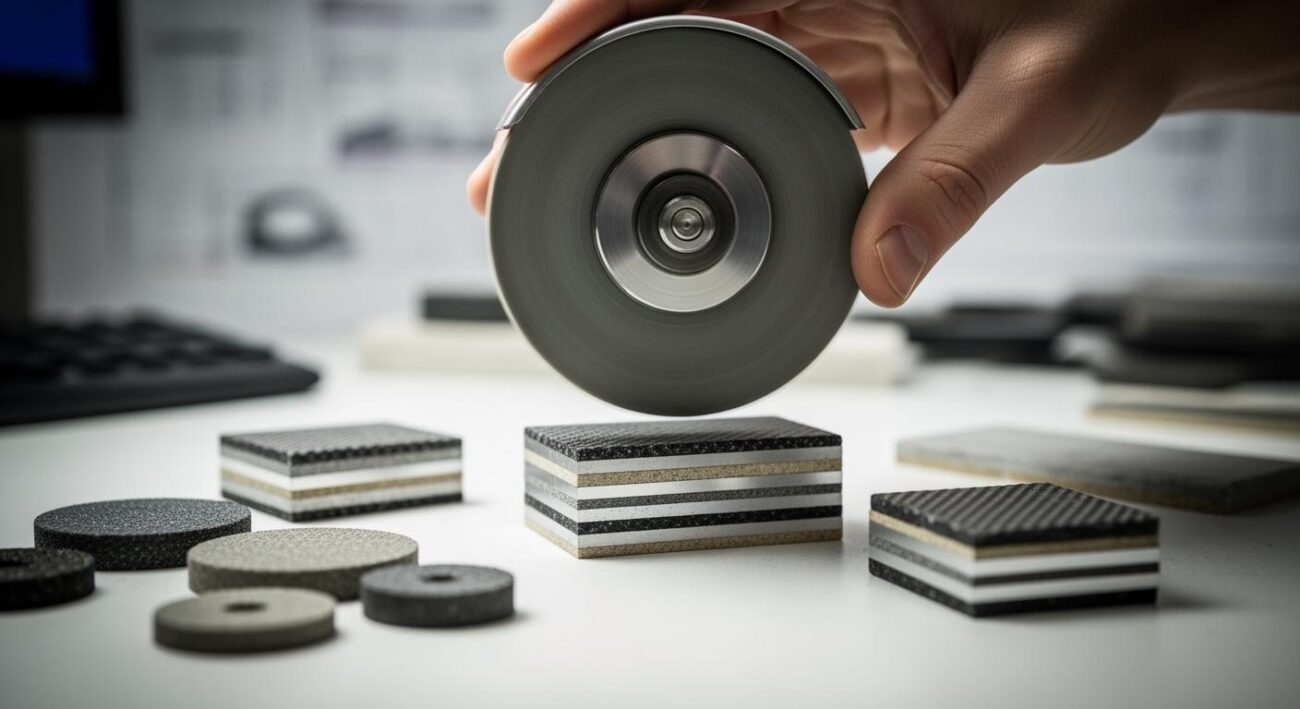
You can turn a simple piece of steel into a razor-sharp chef knife with the right tools and steps. Each part of the Grinding Wheel Workflow shapes the blade and sharpens the edge. You see the blank metal change into a tool you can trust in the kitchen. Aimgrind diamond grinding wheels give you the precision and efficiency you need for great results.
Key Takeaways
- Start with profiling to shape your knife. This step is crucial for a good final product.
- Choose the right grit for each stage of grinding. Lower numbers remove more metal, while higher numbers polish the edge.
- Maintain a consistent bevel angle for sharpness. Use simple tools to help keep your angle steady.
- Inspect your knife for sharpness and symmetry. A well-checked knife performs better and is safer to use.
- Regularly clean and store your grinding wheels properly. This extends their life and ensures consistent results.
Grinding Wheel Workflow Overview
Key Steps in Knife Grinding
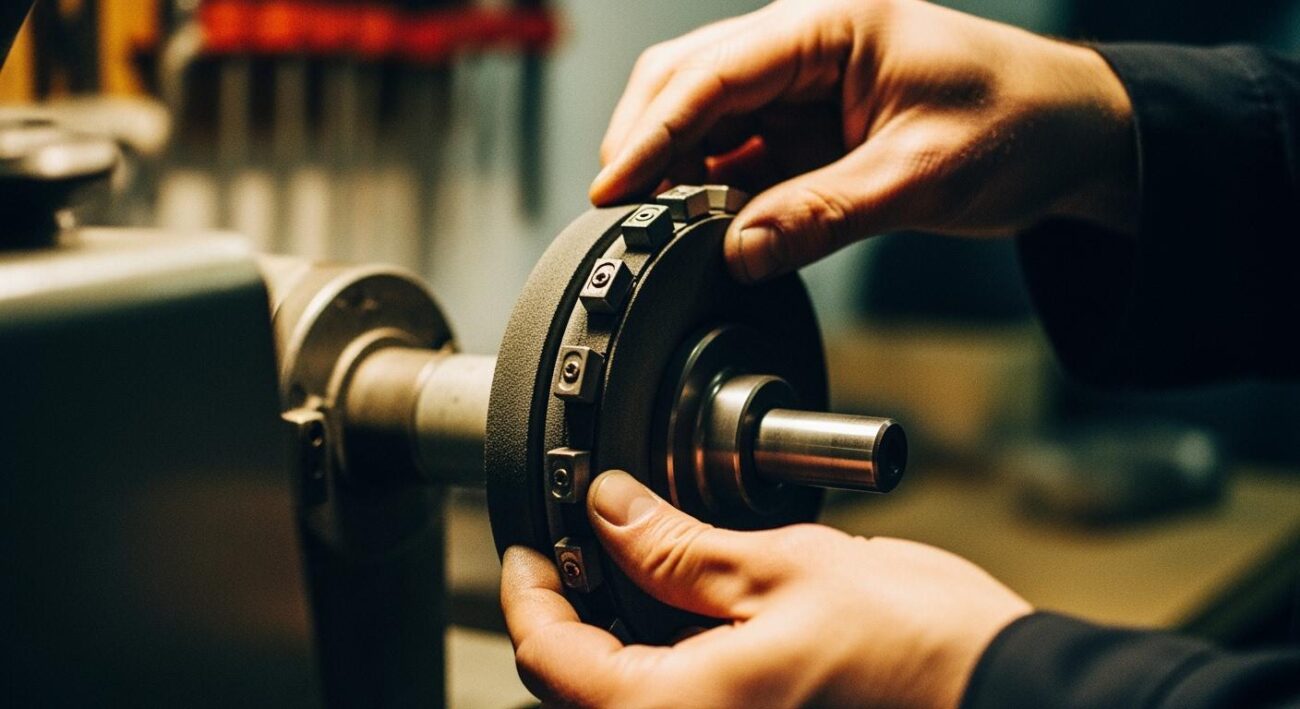
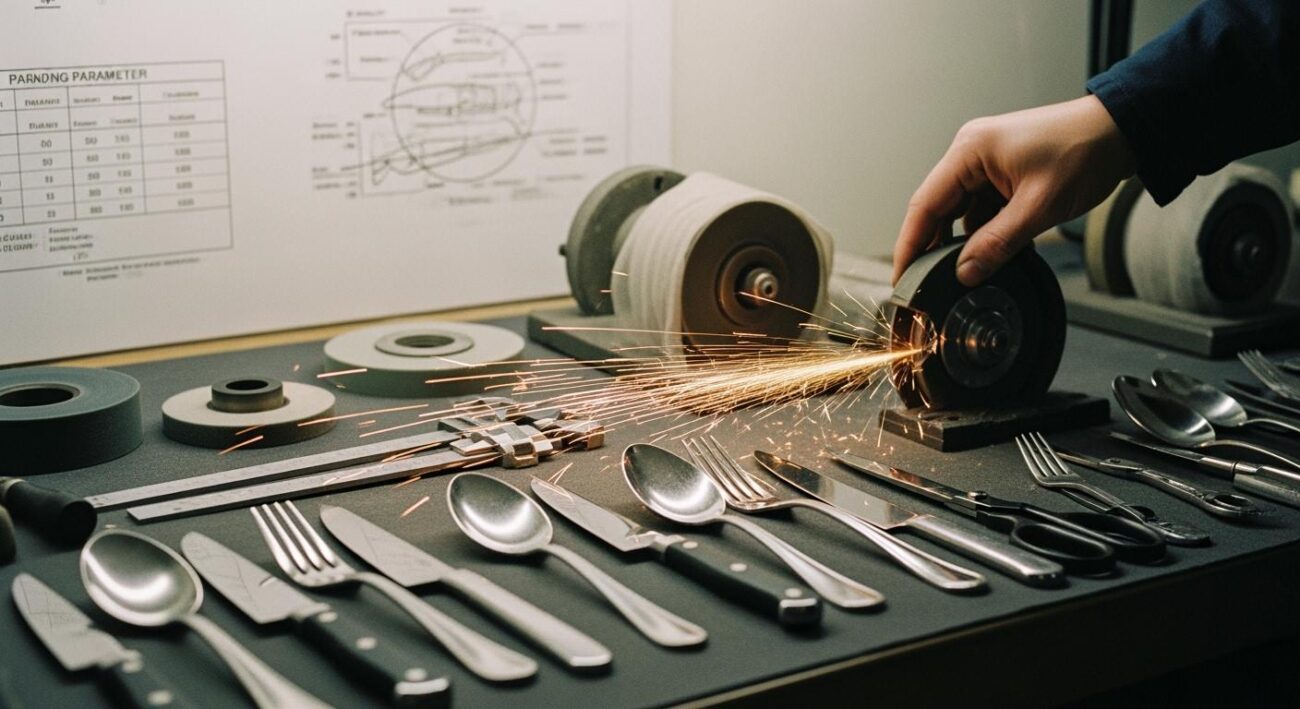
You start the grinding wheel workflow by shaping the blade. This step is called profiling. You use a grinding wheel to cut the outline of the knife from a blank piece of steel. Next, you set the bevel. The bevel forms the cutting edge. You use a grinding wheel with the right grit to make the edge sharp and even. After that, you refine and polish the edge. You switch to finer grits to smooth the surface and remove scratches. The last step is inspection. You check the knife for sharpness and symmetry. You also clean your grinding wheels and store them safely.
Aimgrind helps you at every stage of the grinding wheel workflow. The brand offers diamond grinding wheels that fit each step. You can choose the right wheel for profiling, beveling, or polishing. Aimgrind’s team can help you match the wheel to your machine and your process.
Why Each Stage Matters
Each part of the grinding wheel workflow shapes the final quality of your chef knife. Profiling gives the knife its basic shape. If you skip this step or rush, the knife will not look or feel right. Setting the bevel decides how sharp and strong the edge will be. Polishing removes small marks and makes the knife shine. Inspection helps you find any mistakes before you finish.
You may face some challenges during the grinding wheel workflow. Overheating can damage the steel. You can fix this by adjusting pressure and letting the blade cool. Uneven edges can happen if you use the wrong angle or pressure. You can solve this by checking your technique and making small changes.
| Challenge | Solution |
|---|---|
| Overheating | Adjust pressure and allow cooling time. |
| Uneven edges | Reassess technique and adjust pressure/angle. |
When you follow each step in the grinding wheel workflow, you get a chef knife that looks good and works well. Aimgrind’s diamond grinding wheels help you reach a professional finish every time.
Profiling the Knife Blade
Choosing the Right Grinding Wheels
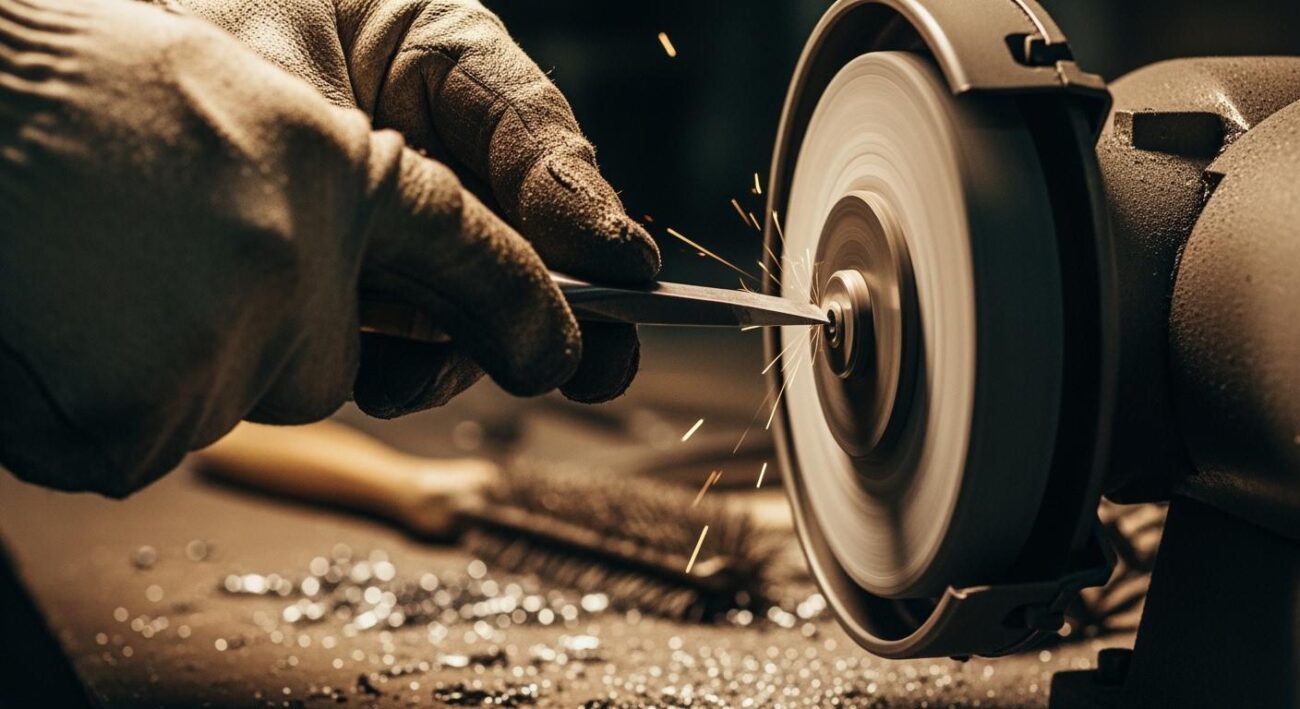
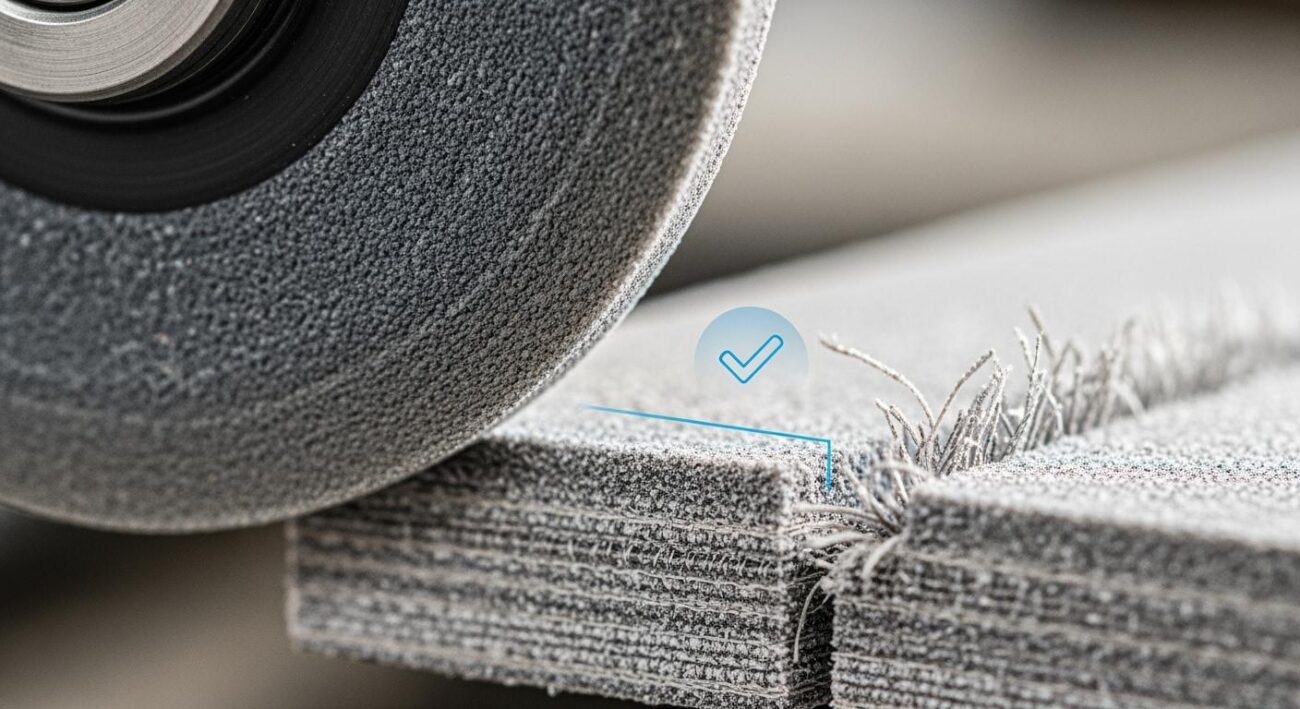
When you start the grinding process for a chef knife, you need a tool that gives you control and accuracy. Aimgrind diamond wheel stands out for profiling because it keeps its shape and cuts cleanly. You can use it to shape the blade profile with less effort and more precision. The diamond wheel lasts longer than traditional wheels, so you spend less time changing tools and more time focusing on your work. This makes the grinding process smoother and more efficient.
Profiling Techniques
You have several ways to shape your blade during the grinding process. Each grind type changes how the knife feels and works. Here is a table to help you compare the most common grind types:
| Grind Type | Description | Advantages |
|---|---|---|
| Flat Grind | Both sides taper toward each other at a consistent angle. | Easy to maintain. |
| Hollow Grind | Concave grind with a thin, sharp edge. | Extremely sharp edge, good for specific tasks. |
| Scandinavian Grind | No secondary bevel, ideal for whittling and woodworking. | Maintains sharpness well for carving. |
| Convex Grind | Rounded bevels on each side, very durable. | Excellent for heavy-duty chopping. |
| Chisel Grind | Ground on one side, similar to woodworking chisels. | Can be made extremely sharp, minimal drag. |
| Compound Bevel | A combination of grinds with a secondary bevel. | Versatile for various cutting tasks. |
| Asymmetrical Grind | Uses two distinct bevel angles for each side. | Produces a more durable edge. |
You can use the grinding process to create any of these shapes. The diamond wheel helps you keep a steady hand and a consistent angle, which is important for a strong blade.
Safety Considerations
Profiling a blade during the grinding process can be risky if you do not follow safety rules. Here are some best practices to keep you safe:
- Always keep your focus on the grinding process and the blade.
- Secure your material before you start grinding.
- Replace dull wheels or broken tools right away.
- Apply steady pressure and avoid forcing the blade.
- Cut away from your body and others nearby.
- Use caution when changing wheels or cleaning up.
- Dispose of used wheels and metal scraps safely.
Tip: Wearing safety glasses and gloves can protect you from sparks and sharp edges during the grinding process.
By following these steps, you make the grinding process safer and more effective. Aimgrind diamond wheel gives you the confidence to shape your blade profile with accuracy and care.
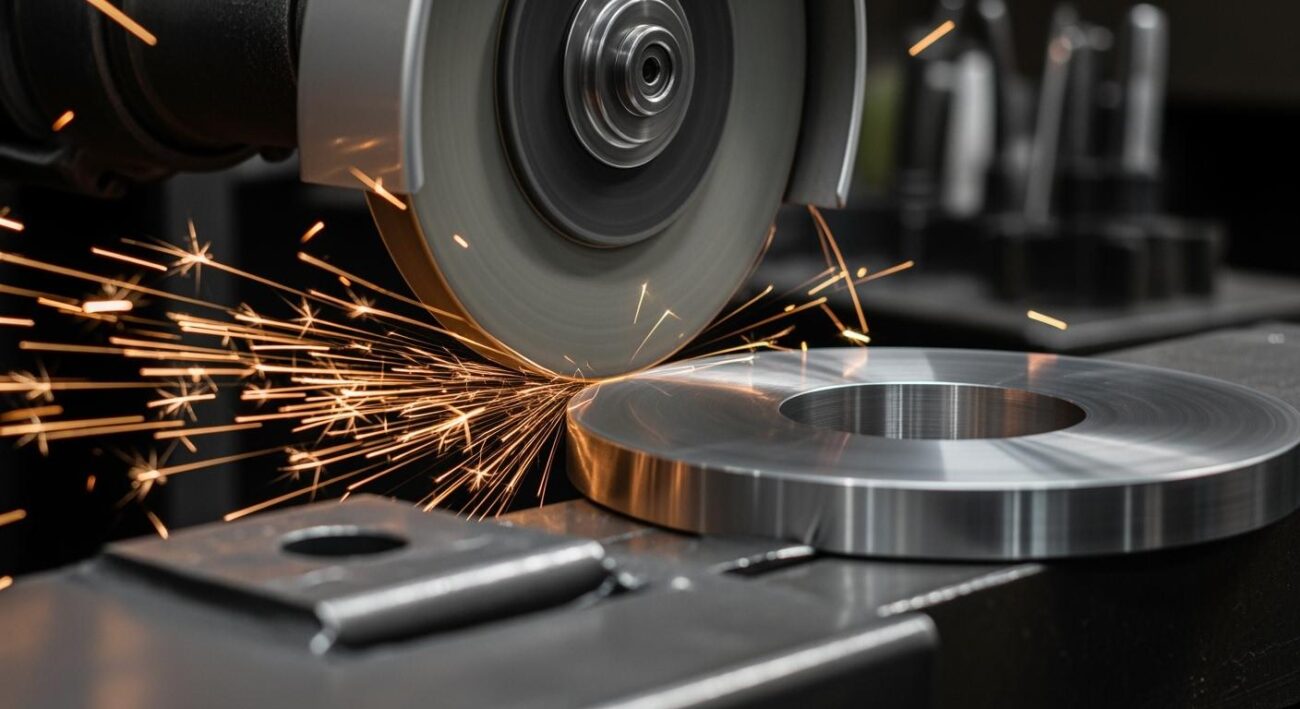
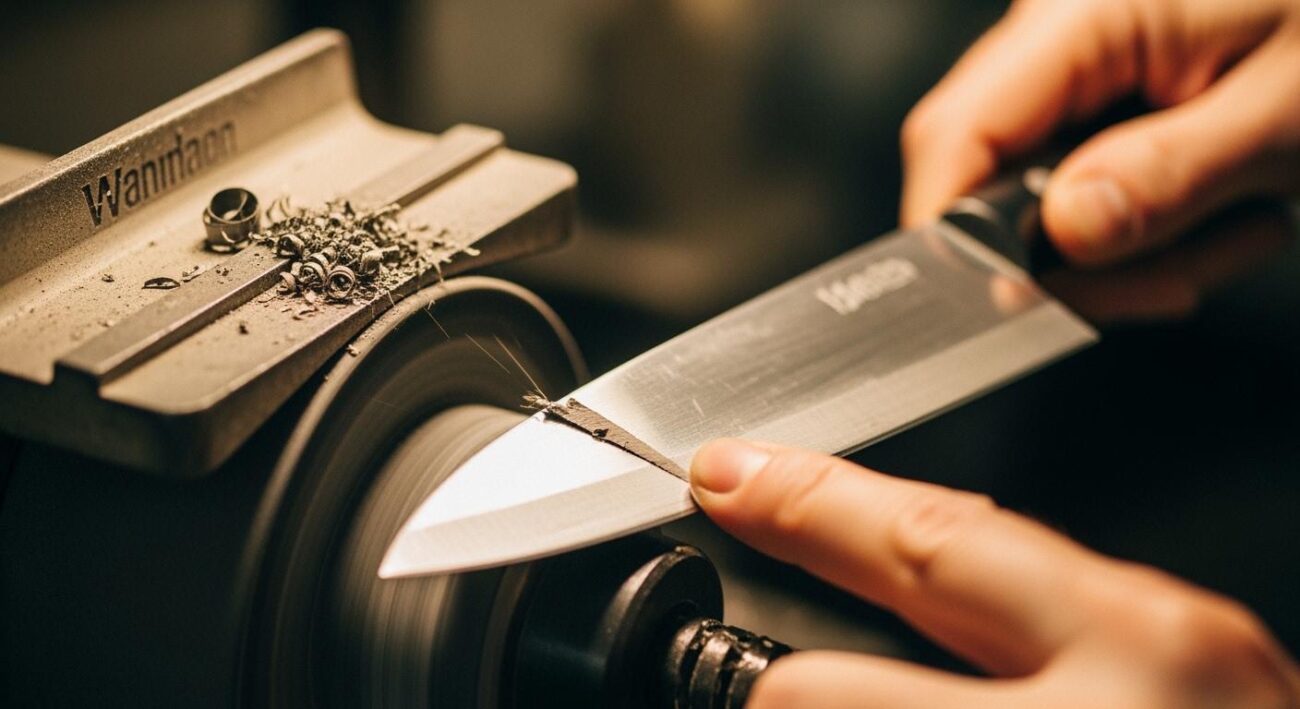
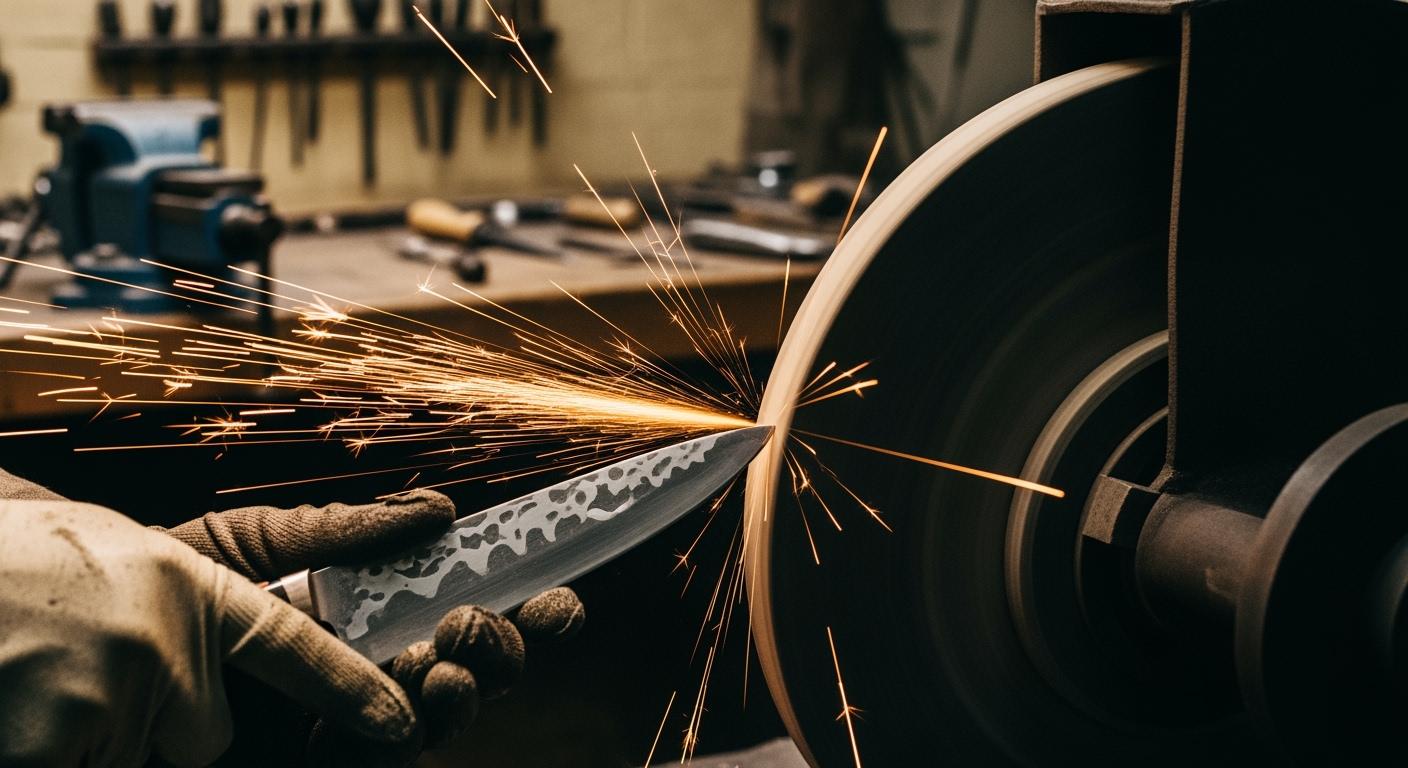
Establishing the Bevel with Grinding Wheels
Grit Selection for Knife Bevels
When you want to create a sharp edge on your chef knife, you need to choose the right grit for your grinding wheels for sharpening. The grit number tells you how rough or smooth the wheel is. Lower numbers mean a rougher surface, which removes more metal. Higher numbers give you a smoother finish. Picking the right grit helps you control how sharp and durable your knife will be.
Here is a table to help you understand which grit to use at each stage:
| Grit Range | Purpose |
|---|---|
| 200 to 400 | For repairing very dull blades or nicks |
| 1000 to 3000 | For refining the edge and removing scratches |
| 3000 to 6000 | For touch-ups and regular maintenance |
| 6000 to 8000 | For achieving a polished, razor-sharp finish |
Start with a coarser grit if your blade has chips or is very dull. Move to a finer grit as you get closer to the final edge. This step-by-step process with grinding wheels for sharpening helps you avoid mistakes and gives your knife a strong, lasting edge.
Tip: Using the right grit at each stage makes your grinding more efficient and protects your blade from damage.
Setting Angles and Consistency
The angle of your bevel decides how sharp and strong your knife will be. Most chef knives use a 30° angle (15° on each side). Keeping this angle steady during grinding is important for a professional result. If you change the angle by mistake, your knife may not cut well or hold its edge.
You can use simple tools and drills to help you keep the right angle. Here is a table with some easy methods:
| Drill | Description | Purpose |
|---|---|---|
| Sharpie Test | Color the bevel with a marker; take three slow strokes. If ink disappears evenly, your angle is true. | Provides instant visual feedback to ensure angle accuracy. |
| Coin-Stack Gauge | Place coins under the knife spine; match that height on every stroke. | Trains wrist to recognize the exact lift without props. |
| Flash-Glint Method | Tilt the blade under bright light until the bevel stops reflecting. | Helps memorize wrist position for consistent angle. |
| Metronome Pressure Drill | Use a metronome to maintain consistent pressure while sharpening. | Builds rhythm for even pressure along the edge. |
Try these drills when you use grinding wheels for sharpening. They help you build good habits and keep your bevels even. You can check your work often to make sure you stay on track.
Note: Consistent angles make your knife sharper and help it last longer.
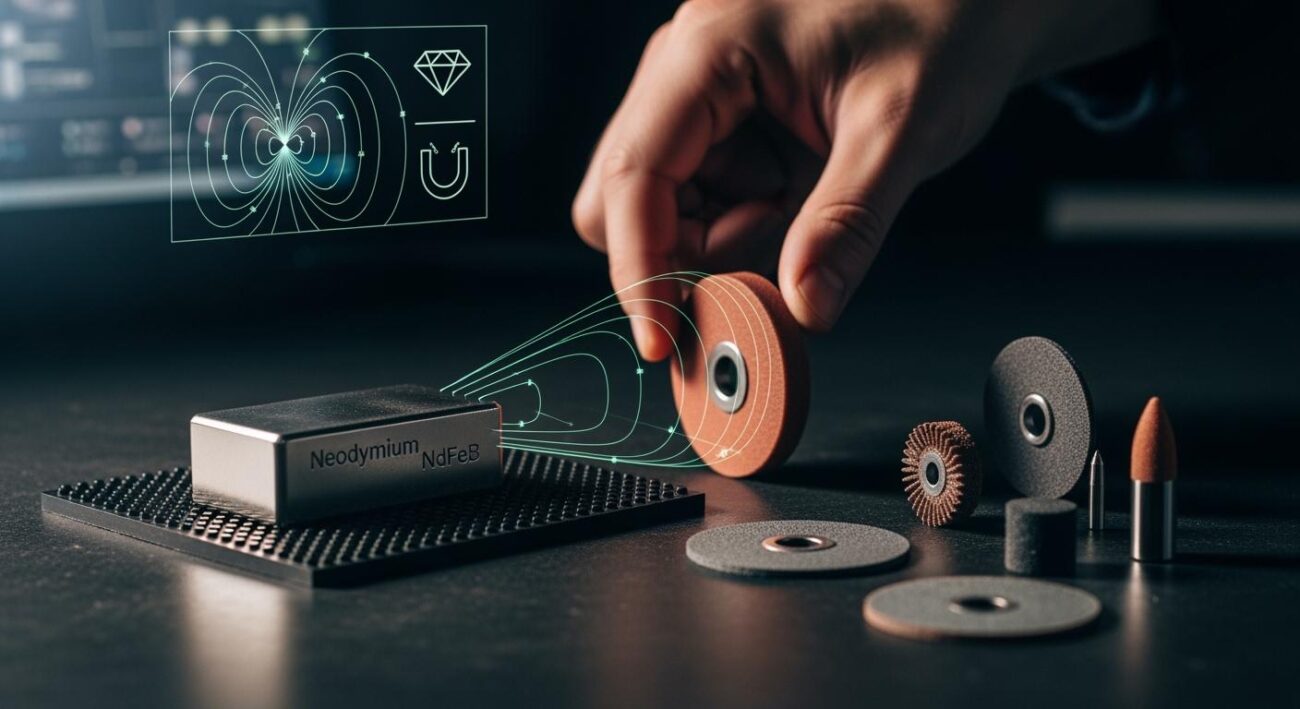
Using Aimgrind Diamond Grinding Wheels
Aimgrind diamond grinding wheels for sharpening give you a big advantage when you set the bevel on your chef knife. These wheels keep their shape during grinding. The diameter does not change, so you do not need to reset your jig or change your setup. This makes it easier to keep your bevel angle steady from start to finish.
Here are some reasons why Aimgrind diamond grinding wheels for sharpening stand out:
- The wheels have diamonds fixed to a steel base. This makes them strong and long-lasting.
- The wheels do not wear down quickly. You get the same grinding surface every time you use them.
- You can switch between different grits without losing your angle or having to adjust your machine.
- The wheels work well for both wet and dry grinding, so you can choose the method that fits your process.
When you use Aimgrind grinding wheels for sharpening, you get a smooth, even bevel. You also save time because you do not need to stop and check your setup as often. This helps you focus on your grinding technique and get better results.
Industry experts say that a 400 grit wheel is a good starting point for setting the bevel. This grit gives you a sharp edge and helps the knife hold its sharpness longer. Some tests show that coarser finishes, like 600 grit, can make the edge last even longer. You can check your sharpness with a tester and aim for a low number, which means your knife is very sharp.
Remember: The right grinding wheels for sharpening, good technique, and steady angles give you a chef knife that cuts well and stays sharp.
By using Aimgrind diamond grinding wheels for sharpening, you make the beveling process easier and more reliable. You get a sharp, durable edge that meets professional standards every time you grind.
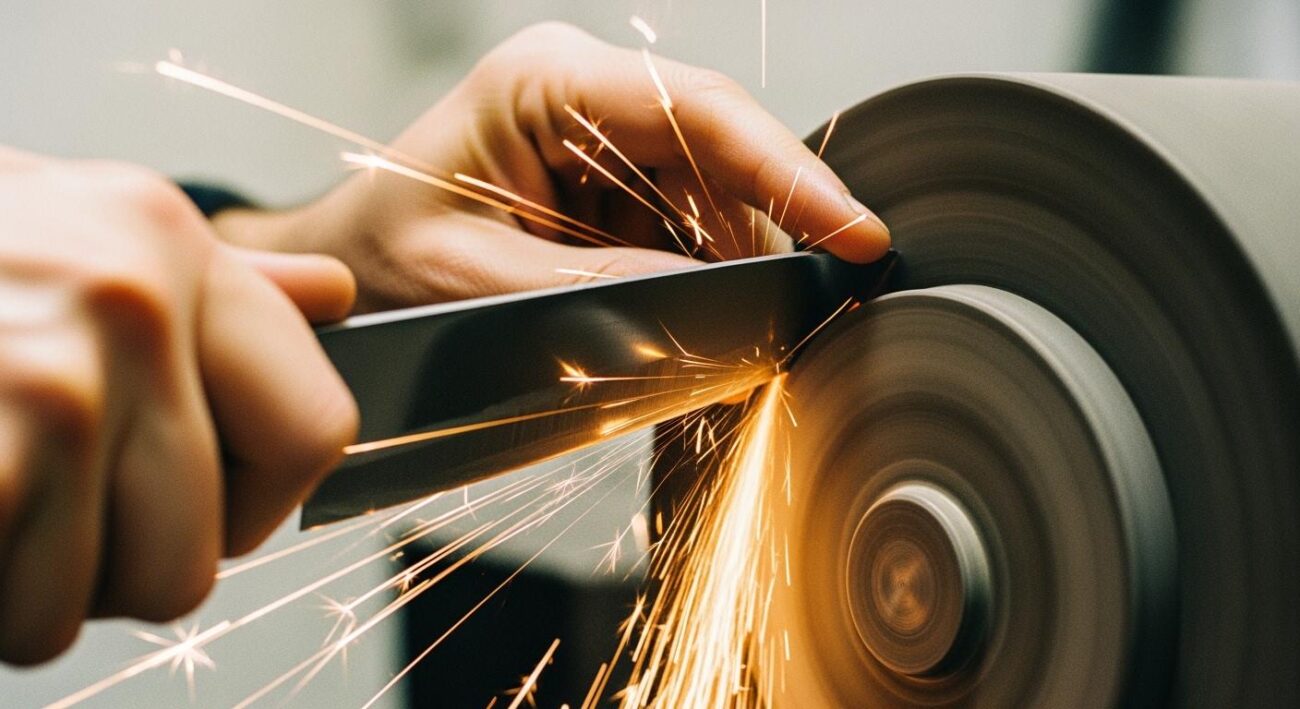
Refining and Polishing the Edge
Finer Grits for Edge Refinement
You move from grinding to polishing when you want your kitchen knives to reach their best sharpness. Finer grit wheels, such as #1000 or higher, help you create a sharp edge that can shave hair. These wheels reduce the need for extra polishing steps. You notice improved sharpening performance and better cutting results. Aimgrind diamond grinding wheels offer long wheel life and cool running, so you keep your kitchen knives safe from overheating. You can use these wheels for both flat and hollow grinds.
When you finish sharpening with higher grit wheels, you see a sharper edge and smoother finish. Your kitchen knives cut with less effort and stay sharp longer.
- Finer grit wheels:
- Give you a sharp edge
- Make polishing easier
- Improve sharpening performance
- Help your kitchen knives last longer
Polishing Techniques
You use several methods to polish your kitchen knives and boost sharpness. Honing, stropping, and sharpening stones all play a role. You start with coarse grit for fixing chips. Medium grit forms a sharp edge. Fine grit, from 4000 to 10000, polishes the blade for slicing meats and vegetables. Aimgrind diamond wheels work well for these steps. You keep the bevel angle steady and apply even pressure. You look for a burr, which shows you removed enough material.
| Technique | Purpose |
|---|---|
| Honing | Aligns the sharp edge |
| Stropping | Refines sharpness |
| Sharpening Stone | Smooths and polishes finish |
Tip: Use water-cooled precision systems or self-sharpening ceramic stones for safer, cooler sharpening.
Achieving a Mirror Finish
You want your kitchen knives to shine and have a sharp edge. You start with sandpaper, moving from coarse to extra fine. You use polishing compounds and a buffing wheel to get a mirror finish. You work in a ventilated area and wear safety gear. Aimgrind diamond wheels help you reach a high-quality finish faster. You see your kitchen knives reflect light and feel the sharpness with every cut.
- Sandpaper: Start with coarse, finish with extra fine.
- Polishing compounds: Add shine and smoothness.
- Buffing wheel: Polish for a mirror finish.
- Safety: Work carefully and protect yourself.
You achieve sharpness and a sharp edge that stands out in your kitchen. Your kitchen knives look professional and perform well every time you use them.
Inspection and Maintenance Workflow
Sharpness and Symmetry Checks
You need to inspect your chef knife before calling it finished. A sharp, symmetrical blade makes kitchen work safer and easier. Start with a visual check. Look for any uneven edges or dull spots. Next, try these simple tests:
- Paper Slice Test: Hold a sheet of paper and slice down. A sharp knife should cut cleanly without tearing.
- Tomato Test: Place a tomato on a cutting board. A sharp blade should break the skin and slice smoothly.
- Visual Inspection: Check for any chips, bends, or rough spots along the edge.
| Method | Description |
|---|---|
| Visual Inspection | Look for dullness, chips, or unevenness. |
| Paper Slice Test | Slice paper; a sharp knife cuts cleanly. |
| Tomato Test | Slice a tomato; a sharp knife glides through the skin and flesh. |
Tip: Always check both sides of the blade for symmetry. Even bevels help your knife cut straight and last longer.
Cleaning and Storing Grinding Wheels
Proper care for your Aimgrind diamond grinding wheels keeps them working well. Inspect the wheel before and after each use. Look for signs of wear or damage. Clean the wheel with a soft brush to remove metal dust. Store your wheels in a cool, dry place to prevent rust and damage. Dress the wheel regularly to keep its shape and sharpness. Avoid excessive pressure during grinding to prevent wheel loading and overheating.
| Common Issue | Prevention Strategy |
|---|---|
| Wheel Loading | Use correct pressure and clean after use. |
| Glazing | Dress the wheel often to maintain sharpness. |
| Overheating | Allow the wheel to cool and use coolant if possible. |
| Improper Installation | Check alignment and clean spindles before mounting. |
Note: Regular inspection and proper storage extend the life of your Aimgrind wheels and keep your grinding results consistent.
Knife Maintenance Tips
Keep your chef knife in top shape with simple routines. Hone your knife regularly to maintain sharpness. Wash your knife by hand and dry it right away to prevent rust. Store your knife in a knife block, sheath, or on a magnetic strip to protect the edge and handle. Sharpen your knife weekly if you use it often, or at least once a month for lighter use. Sharpen as soon as you notice it struggling to cut a tomato.
- Hone the blade often.
- Clean and dry by hand.
- Store safely to avoid damage.
- Sharpen on a regular schedule.
A well-maintained knife and grinding wheel make every kitchen task easier and safer.
You shape chef knives step by step at your workstation. You start with profiling, then set the bevel, refine the edge, and finish with inspection. You improve your results by practicing at your workstation and repeating each method. You experiment with different tools at your workstation to find the best options. You use quality tools at your workstation, like Aimgrind diamond grinding wheels, for the best options and quality finish. You can explore more tools and solutions for your workstation on Aimgrind’s website.
- Consistent practice at your workstation refines your grinding technique.
- Experimenting with tools at your workstation helps you find the best options.
- Repeating methods at your workstation leads to better quality chef knives.
FAQ
What is the best way to keep my knife sharp with a grinding wheel?
You should use a grinding wheel with the right grit for your knife. Start with a coarse wheel for shaping. Move to a finer wheel for sharpening. Check your knife often. This helps you keep the edge sharp and improves cutting performance.
How do I achieve consistency when I grind a hollow grind on my knife?
You can use guides or jigs to hold your knife steady. Move the knife slowly across the wheel. Check both sides often. Achieving consistency means your hollow grind will look even and cut well. Practice helps you get better results.
Why does my knife lose its edge after grinding?
You may use too much pressure or the wrong angle. The wheel can overheat the knife. This weakens the edge. Use light pressure and keep the knife cool. Check your grind often. This keeps your knife sharp and improves performance.
What makes a hollow grind good for chef knives?
A hollow grind gives your knife a thin, sharp edge. This helps with slicing and cutting. You get less resistance when you cut food. The wheel shapes the hollow grind well. Many chefs like this grind for its performance and easy sharpening.
How do I clean and store my grinding wheel for best performance?
Clean your wheel with a soft brush after each use. Store the wheel in a dry place. Check for damage before using it again. This keeps your wheel in good shape. You get better performance and achieve consistency in your knife grinding.
Contact Us
For More Grinding Solution or Customized Abrasive Tools