You can repair motorcycle parts easily and get great results with flexible grinding materials. Aimgrind’s resin bond grinding wheels give you high-quality abrasives that work well for many repair jobs. These tools help you handle tough materials like stainless steel or plastic. Even if you have little experience, you can achieve a strong, smooth finish. Trust these tools to make your repair projects simple and effective.
Key Takeaways
- Use Aimgrind resin bond grinding wheels for effective motorcycle part repairs. They provide flexibility and strong cutting power for various materials.
- Choose the right abrasives based on the material of your motorcycle parts. Soft materials need gentle abrasives, while harder materials require aggressive options.
- Always prioritize safety by wearing protective gear and setting up a clean workspace. This ensures a safe and effective repair process.
- Thoroughly clean and inspect surfaces before repairs. This step is crucial for achieving a strong bond and high-quality finish.
- Finish repairs with polishing and protective coatings. This enhances durability and maintains the appearance of your motorcycle parts.
Essential Flexible Grinding Materials and Abrasives
Aimgrind Resin Bond Grinding Wheels Overview
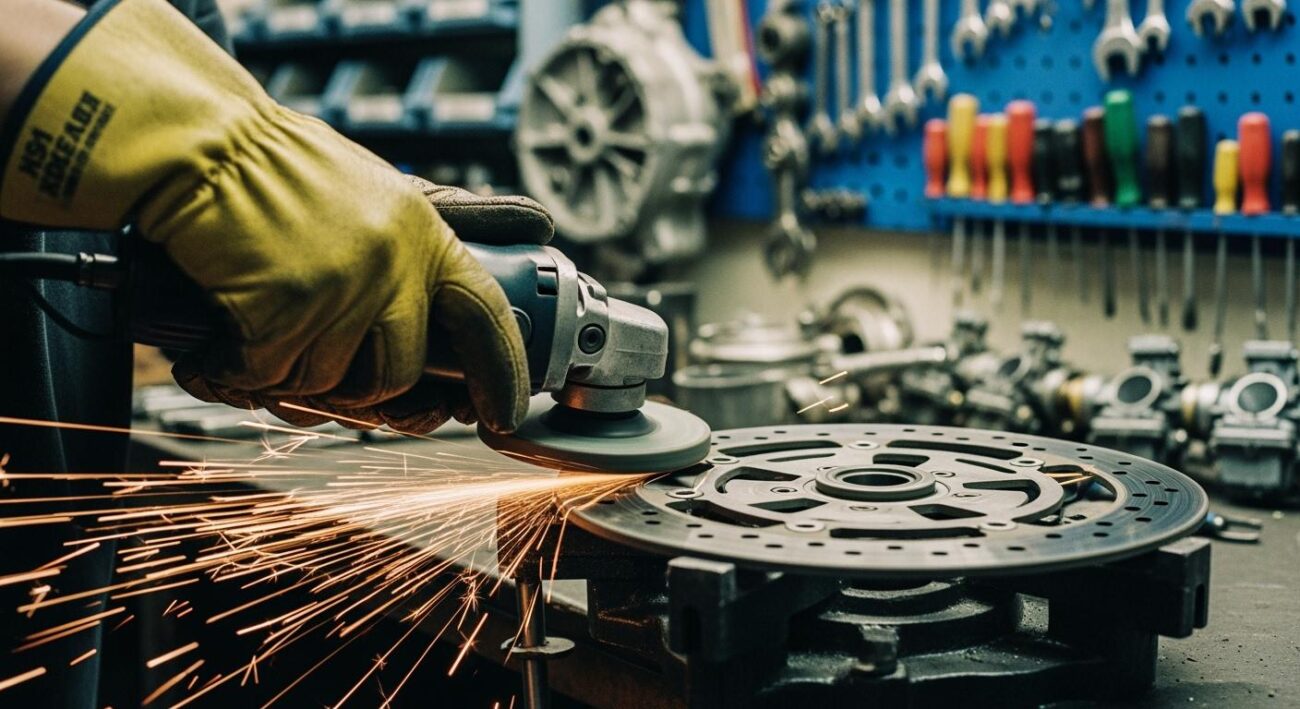
You need the right tools for motorcycle part repair. Aimgrind resin bond grinding wheels stand out among flexible grinding materials. These wheels combine flexibility with strong cutting power. You can use them for high-speed grinding on tough metals like stainless steel or titanium. The resin bond helps the wheel keep its shape and sharpness, even after many uses. This makes them a top choice for both DIY projects and professional metal fabrication. Aimgrind offers these wheels in different sizes, so you can match them to your specific grinding job.
Choosing the Right Abrasives for Motorcycle Parts
Selecting the correct abrasives is important for a quality repair. Follow these steps to choose the best option for your motorcycle parts:
- Identify your part’s material. Soft materials like plastic or thin aluminum need gentle abrasives such as plastic media or glass beads. Harder parts, like steel or cast iron, work well with aggressive abrasives like aluminum oxide or steel grit.
- Decide on the finish you want. If you need to remove rust or create a rough surface for paint, use angular abrasives. For a smooth, matte finish, choose spherical abrasives like glass beads.
- Check if your project has any special requirements. Some repairs follow strict standards that may limit which abrasives you can use.
Flexible abrasive products from Aimgrind help you handle many types of motorcycle parts with confidence.
Safety Gear and Setup
Safety comes first when using flexible grinding materials and abrasives. Always wear the right gear to protect yourself. Here is a quick guide:
| Feature | Detail |
|---|---|
| Material | High-impact polycarbonate |
| Headgear Type | Adjustable ratchet headgear |
| Safety Standards | ANSI Z87.1+, CSA Z94.3 |
| Comfort Features | Cushioned padding, anti-fog coating |
| Compatibility | Works with safety glasses and hearing protection |
You should also use a washable sweatband and make sure your headgear fits well. Set up your workspace in a clean, dry area. Store your abrasives off the ground and away from dampness. Keep grinding belts and wheels on racks or in boxes to prevent damage. This helps your flexible grinding materials last longer and perform better.
Surface Preparation and Inspection
Cleaning and Assessing Damage
You start every motorcycle repair with proper cleaning and surface preparation. This step removes dirt, grease, and oils from the surface. You use mild soap and soft cloths for cleaning. You make sure to scrub away stubborn residues like tar or glue. After cleaning, you lightly sand the surface with fine-grit paper. Sanding creates a texture that helps materials stick better during surface preparation. You finish cleaning and surface preparation by applying a primer. Primer prepares the surface for paint or filler and gives a smooth finish.
Tip: Effective cleaning and surface preparation help you achieve a strong bond and a high-quality finish. You avoid problems later by removing all contaminants during cleaning and surface preparation.
Identifying Cracks, Scratches, and Surface Issues
You inspect the surface closely after cleaning. You look for cracks, scratches, and other surface imperfections. You use visual inspection to check the depth and extent of damage. For deep scratches, you start wet sanding with coarser grit sandpaper. You move to finer grits to feather the damaged area. You remove sanding debris before polishing. You apply polishing compounds with soft pads in circular motions. This restores clarity and smoothness to the surface. For deep scratches that reach paint layers, you use touch-up paint and clear coating. You blend repairs with light sanding and polishing. For structural cracks, you use plastic welding to fuse and strengthen the surface. You finish with protective sealants to preserve shine and protect against UV damage.
Preparing the Work Area
You organize your workspace before starting cleaning and surface preparation. You choose a clean, dry area for surface preparation. You keep abrasives and tools off the ground. You store grinding wheels and belts in boxes or racks. You make sure your workspace has good lighting. You wear safety gear during cleaning and surface preparation. You control the environment to avoid damage to sensitive materials like ABS plastic or fiberglass. You keep your work area tidy to make surface preparation easier and safer.
| Step | Action |
|---|---|
| 1 | Clean the surface thoroughly |
| 2 | Inspect for cracks and scratches |
| 3 | Prepare the workspace for repair |
You follow these steps for successful cleaning and surface preparation. You get a strong, smooth surface ready for repair.
Repair Techniques with Flexible Grinding Materials
Fixing Minor Surface Damage
You can fix minor surface damage on motorcycle parts with flexible grinding materials. Start by removing the plastic fairings or metal panels. Wash the part with warm water and mild soap. Use a degreaser to clean the surface. Inspect the area for hidden cracks. Mark the spots needing repair.
Follow these steps to repair minor scratches and scuffs:
- Use 240-grit abrasives to sand deep scratches. Move the abrasives in a steady motion across the surface.
- Switch to 400-grit abrasives to feather the repair. Smooth the surface so it blends with the surrounding metal or plastic.
- Finish with 800-grit abrasives for final sanding. This prepares the surface for primer and paint.
- Mask areas not needing paint. Apply a thin coat of primer. Wet sand the primer with fine abrasives to create a smooth surface.
Tip: Always clean the surface before you start grinding. This helps abrasives work better and prevents contamination.
Flexible grinding materials help you achieve a uniform finish. You avoid uneven spots that rigid tools can leave behind. Flexible abrasives self-center and make basic weld cleanup easier. You get a smooth surface ready for paint or further fabrication.
Using Aimgrind Wheels to Repair Cracked Plastic
You can repair cracked plastic parts with Aimgrind resin bond grinding wheels. These wheels offer flexibility and strong cutting power. You use them to grind and shape plastic fairings or other motorcycle parts. Start by identifying the material. Clean the surface with mild soap and degreaser. Mark the crack.
Begin grinding along the crack with Aimgrind wheels. Create a V-groove in the plastic. This groove helps adhesives bond better. Use abrasives for welding to clean the groove. Apply plastic repair adhesive to the crack. Press the edges together. Let the adhesive cure.
After curing, use flexible grinding wheels to smooth the weld. Feather the surface with finer abrasives. You can use weld grinding to blend the repair with the surrounding area. Finish with primer and paint. Flexible abrasives help you avoid damaging the plastic. You get a strong, smooth surface that lasts.
Note: Flexible grinding materials provide higher bond strength than sandblasting or laser treatments. You achieve durable repairs with Aimgrind wheels.
Advanced Methods for Deep Cracks and Structural Repairs
You face deep cracks or structural damage in motorcycle parts. Flexible grinding materials help you tackle these tough repairs. Start by identifying the material. Clean the surface with abrasives. Use weld cleaning to remove debris.
For long cracks, use welding with compatible filler rods. Create a V-groove with grinding wheels. This groove allows the weld to penetrate deeper. Use abrasives for welding to clean the groove. Weld the crack. Let the weld cool.
Apply fiberglass mesh behind the repair for extra strength. Layer two-part epoxy filler over the mesh. Let each layer cure before adding the next. Use flexible fillers to match the natural flex of the motorcycle part. Grind the surface with flexible wheels. Smooth the welds with finer abrasives. Finish with primer and paint.
You can use a layered approach for larger repairs. Start with adhesion. Fill the structure with epoxy or body filler. Grind and smooth the welds. Flexible grinding materials help you achieve uniform surface finishes. You avoid smeared surfaces that rigid tools can cause.
Callout: Flexible honing achieves a uniform surface finish and is easy to use. Rigid honing only contacts high points and can leave parts untouched.
You get strong welds and smooth surfaces with flexible grinding materials. You restore the shape and strength of metal parts. You improve fabrication outcomes and reduce the risk of future cracks.
Here is a comparison of repair methods:
| Method | Shear Bond Strength (MPa) | Notes |
|---|---|---|
| Grinding with Diamond Bur | Highest | Statistically significant difference compared to laser treatments. |
| Sandblasting | Moderate | Similar surface roughness to grinding. |
| Short/Long-pulsed Laser | Lower | Insufficient power output for effective surface modification. |
| Control Group | Recommended Range (10-13) | Bond strength values were around the clinically acceptable level. |
Flexible grinding materials give you the best results for weld repairs and fabrication. You achieve strong welds, smooth surfaces, and lasting repairs.
Finishing and Surface Perfection
Smoothing and Blending with Abrasives
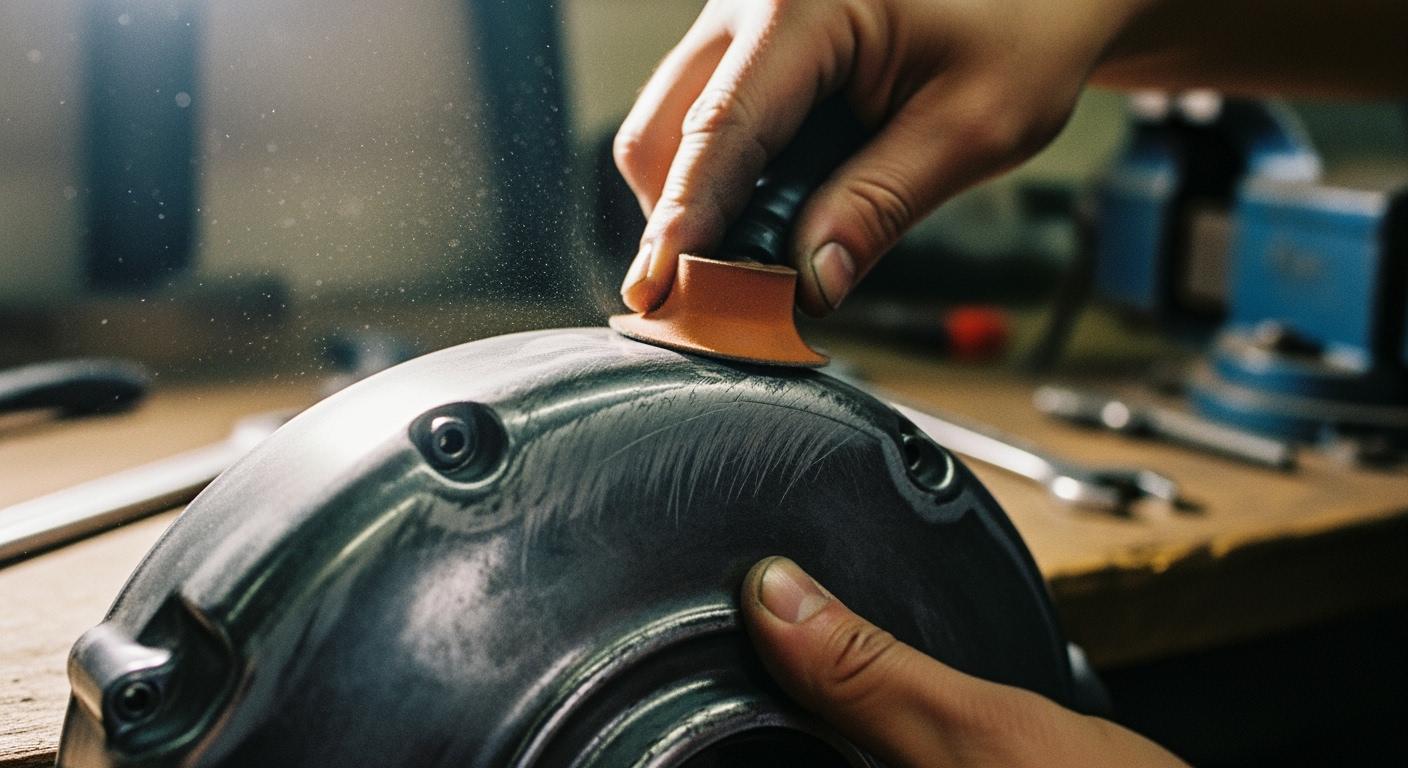
You achieve a seamless surface by using the right abrasives and techniques. Start by sanding beyond the visible repair zone. Extend your sanding 3 to 5 centimeters past the weld. This helps blend the finish with the surrounding area. Inspect the surface and plan your feathering from the edge toward the center. Use a dual-action sander with finer grits, such as 1500 or higher, for metallic and pearl paints. These abrasives protect reflective particles and create a smooth finish. Make final light passes with 600 grit or higher before applying primer. Keep the surface clean between grits. Dust can affect adhesion and ruin the finish. Apply light, even pressure while sanding. Avoid carving into the plastic. Use overlapping passes with a random orbital sander. This ensures an even finish. If you see gouges or uneven areas after initial sanding, apply a light layer of plastic filler. Sand it flush with the surface for a mirror-like surface finish.
Final Polishing and Protective Coating
Polishing gives your motorcycle part a mirror finish. Start with cutting compounds. Move to medium and fine polishes. Use soft pads and avoid heat buildup during polishing. You polish the surface until it looks smooth and shiny. For a polished weld, use weld finishing techniques. This includes polishing the weld area with abrasives and blending it with the rest of the surface. After polishing, apply a protective coating. Cerakote offers durability and protection against wear. It resists corrosion and reduces maintenance. Ceramic coatings provide a tough layer. They protect paint from UV rays, contaminants, and water spots. These coatings enhance the shine of chrome parts and prevent corrosion. The hydrophobic effect makes cleaning easier. Dirt and water slide off the polished surface.
Pro Tips for Durable Results
Follow these expert tips for lasting repairs:
- Clean the surface thoroughly before sanding. Remove dirt and grease.
- Sand with medium grit abrasives (180-220) first. Switch to fine grit (1500-2000) for a smooth finish.
- Use welding to fuse cracks. Align edges and smooth excess material for a seamless weld.
- Fill gouges with plastic-compatible filler. Sand it smooth and apply primer for better paint adhesion.
- Apply multiple thin coats of paint. Let each layer dry to avoid runs.
- Polish with cutting compounds, then use medium and fine polishes for a glossy finish.
- After polishing, apply wax or ceramic coating. This guards against UV damage and wear.
Tip: Consistent grinding and weld finishing help you achieve a polished, durable finish. You restore the surface and protect it for long-term use.
You create a professional-quality finish by following these steps. Your motorcycle part looks polished and stays protected. You enjoy a mirror finish that lasts.
You see how flexible grinding materials help you repair motorcycle parts with ease. Aimgrind resin bond grinding wheels let you restore the surface and strengthen every weld. You can fix cracks, smooth the surface, and blend each weld for a professional finish. You trust these tools to handle tough repairs and keep the surface strong. You follow each step to clean the surface, inspect every weld, and prepare the surface for lasting results. You polish the surface and protect each weld from damage. You maintain the surface and check every weld for signs of wear. You keep the surface clean and lubricate moving parts. You cover the surface and store it away from moisture. You inspect the surface and replace seals near each weld. You achieve a durable surface and a strong weld every time.
- Regularly clean parts to eliminate corrosive substances.
- Promptly lubricate moving components to avoid rust and wear.
- Utilize protective covers or store in sheltered areas to minimize UV and moisture exposure.
- Regularly inspect and replace seals and gaskets as necessary.
You gain confidence by following these steps. You create a smooth surface and a strong weld that lasts.
FAQ
What motorcycle parts can you repair with flexible grinding materials?
You can repair metal panels, plastic fairings, and brackets. Flexible grinding materials help you fix scratches, cracks, and surface damage. You restore the shape and strength of many parts.
How do you choose the right Aimgrind resin bond grinding wheel?
You check the material of your motorcycle part. You select a wheel size that fits your grinder. You pick a grit level based on the damage. Aimgrind offers wheels for tough metals and plastics.
Is it safe to use flexible grinding materials at home?
You stay safe by wearing protective gear. You keep your workspace clean and dry. You follow instructions for each tool. You avoid rushing and check your equipment before starting.
How long does a repair last after using Aimgrind wheels?
You get durable repairs when you follow the steps. You clean, grind, and finish the surface. You apply protective coatings. Your repair can last for years with regular maintenance.
Contact Us
For More Grinding Solution or Customized Abrasive Tools