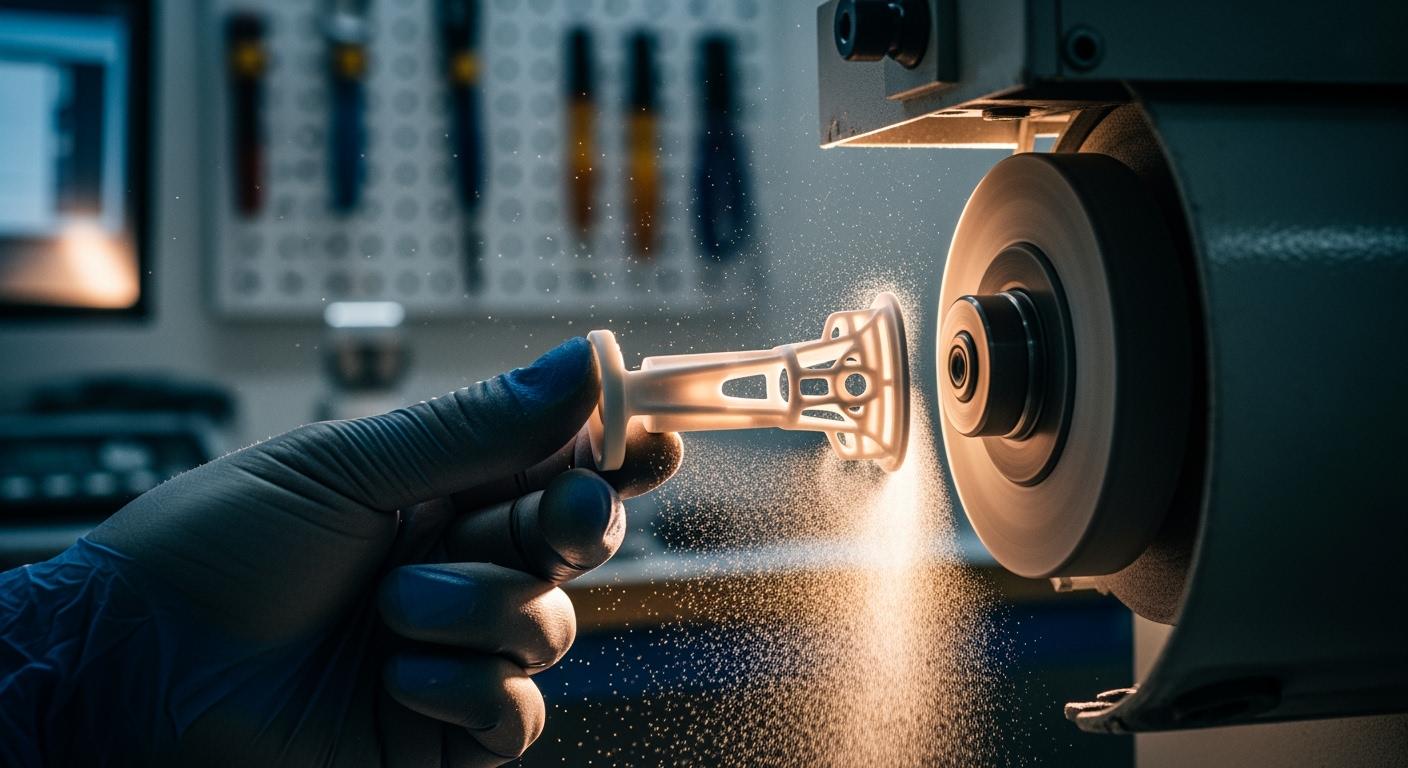
Grinding thin-walled ceramic parts requires your attention to detail and careful handling. You must use suitable tools and apply the right technique to avoid costly mistakes.
Breakage in thin-walled ceramic parts can occur due to frictional contact between electrodes under voltage, leading to excessive heating and resulting in brittle cracks and chipping. Additionally, inappropriate combinations of materials for the wire tool and workpiece can exacerbate these issues, causing mechanical destruction and debris formation.
Patience and precision matter. If you ignore these, you risk damage and higher manufacturing costs.
| Evidence | Explanation |
|---|---|
| Damage control is necessary during grinding | This indicates that costs are incurred to prevent breakage, which can lead to higher overall manufacturing expenses. |
| Edge chipping and subsurface microcracking are risks | These risks can lead to part rejection and additional costs associated with warranty claims or recalls. |
| Design choices influence breakage risks | Poor design can increase the likelihood of breakage, thus raising manufacturing costs. |
You can reduce stress points by adding chamfers or radii. Thin sections chip easily, so proper setup is essential when you grind thin-walled ceramic parts.
Key Takeaways
- Choose Aimgrind diamond grinding wheels for high precision and durability when grinding thin-walled ceramics.
- Use slow speeds and light pressure to minimize the risk of cracks and chips during the grinding process.
- Implement proper fixturing and support to stabilize thin-walled ceramics and prevent vibrations that can lead to breakage.
- Regularly maintain and store your grinding tools correctly to ensure optimal performance and longevity.
- Monitor for signs of stress, such as unusual noises or vibrations, and respond quickly to prevent damage.
Selecting the Right Grinding Tools for Thin-Walled Ceramics
Best Diamond Grinding Wheels and Abrasives
You need the right tools to grind thin-walled ceramic parts safely and efficiently. Diamond grinding wheels stand out as the best choice for this task. These wheels offer high precision and produce fine finishes, which are essential for delicate ceramic materials. You can rely on Aimgrind diamond grinding wheels because they use industrial-grade diamond powder. This material gives you a longer service life and stable grinding performance.
Here is a comparison of Aimgrind diamond wheels and other brands:
| Feature | Aimgrind Diamond Wheels | Other Brands |
|---|---|---|
| Material | Industrial-grade diamond powder | Varies |
| Service Life | Up to 80 times longer than resin wheels | Generally shorter |
| Grinding Efficiency | High efficiency & stable dimensions | Varies |
| Eco-friendliness | Minimal dust, odor & heat | Varies |
| Application Suitability | High-speed, high-precision applications | Varies |
You can use cut-off wheels to make clean, burr-free cuts on thin-walled tubing. High-precision infeed of grinding tools prevents damage to thin-walled ceramic workpieces. Ceramic abrasives also help you achieve fast cutting rates and longer tool life. These abrasives self-sharpen through micro-fracture, which keeps the grinding surface fresh.
| Property | Ceramic Abrasives | Aluminum Oxide/Zirconia Abrasives |
|---|---|---|
| Life | Longest life (2-5x more) | Moderate life |
| Cutting Rate | Fastest cut rate | Slower cut rate |
| Self-Sharpening | Yes (micro-fracture) | No |
| Heat Sensitivity | Sensitive to heat | More heat resistant |
| Applications | Metalworking, ceramics, composites | General purpose |
You should choose diamond grinding wheels from Aimgrind when you grind thin-walled ceramic parts. These wheels manage the challenges of ceramics and help you avoid cracks and chips.
Maintaining Tool Condition and Proper Storage
You must keep your grinding tools in top condition to ensure safe and precise results. Daily parameter verification helps you maintain consistent wheel performance. Weekly intensive maintenance removes contamination and wear that daily cleaning cannot fix. You need to check diamond exposure levels every week. Optimal diamond exposure ranges from 30-40% of diamond height protruding from the bond matrix. If diamonds are over-exposed, dressing operations are necessary. Controlled bond removal helps when diamonds are under-exposed.
Tip: Regular maintenance prevents premature wear and keeps your grinding wheels sharp.
Proper storage protects your diamond grinding wheels from damage and moisture. You can use a tool chest with dry, separated compartments. Wall racks keep wheels away from moisture. Shelves should be clean and elevated.
| Storage Location | Condition |
|---|---|
| Tool Chest | Dry, Separated Compartments |
| Wall Rack | Away from Moisture |
| Shelf | Clean, Elevated |
You must store your tools correctly to preserve their effectiveness. This practice helps you grind thin-walled ceramic parts without risking breakage.
Optimizing Grinding Settings for Safety and Precision
Grinding thin-walled ceramic parts demands careful control of your machine settings. You must pay attention to speed, feed rate, depth of cut, and temperature. These factors help you avoid cracks and chips. If you set your machine too fast or apply too much force, you risk damaging the ceramic. You can achieve safe and precise results by following these guidelines.
Speed, Feed Rate, and Depth of Cut
You need to use slow speeds when you grind thin-walled ceramic parts. High speeds increase friction and heat, which can cause cracks. Slow speeds give you more control and reduce stress on the material. You should also use a gentle feed rate. If you push the wheel too quickly, you create extra pressure and risk breakage.
Depth of cut is another important factor. Thin-walled ceramics are brittle, so you must keep the depth of cut light. Recommended depths range from 0.05 to 0.3 mm. If you increase the depth, you raise mechanical forces and make cracking more likely.
- Adjusting the depth of cut affects the risk of cracking in thin-walled ceramics.
- Light cutting minimizes fracture risk. Depths between 0.05 to 0.3 mm work best.
- Deeper cuts increase mechanical forces and raise the chance of cracks.
You can use a table to compare safe and risky grinding settings:
| Setting | Safe Range | Risky Range |
|---|---|---|
| Speed | Slow (500-1500 rpm) | Fast (>2000 rpm) |
| Feed Rate | Gentle (0.1-0.5 mm/s) | Aggressive (>1 mm/s) |
| Depth of Cut | Light (0.05-0.3 mm) | Deep (>0.3 mm) |
Tip: Always start with the lowest settings and increase gradually. Watch for signs of stress or cracking.
Coolant Use, Wet Grinding, and Temperature Control
You must control temperature when you grind thin-walled ceramic parts. Heat builds up quickly and can cause thermal cracks. Using coolant helps you keep the workpiece cool. Wet grinding is the best method for ceramics. Water or specialized coolants remove heat and flush away debris.
You should apply coolant directly to the grinding zone. This practice prevents overheating and reduces friction. If you see steam or smell burning, you need to add more coolant or slow down the process.
- Wet grinding lowers the risk of thermal cracks.
- Coolant keeps the grinding wheel and ceramic part cool.
- Proper temperature control improves surface finish and prevents breakage.
You can use a block quote for a quick reminder:
Remember: Coolant is your friend. It protects your ceramic parts and keeps your grinding wheels in top shape.
You must monitor temperature throughout the process. If the ceramic feels warm, pause and let it cool. You can use infrared thermometers for precise checks. Keeping the temperature low ensures you grind thin-walled ceramic parts safely and achieve a smooth finish.
Supporting and Stabilizing Thin-Walled Ceramic Parts
Fixturing and Rigid Support Methods
You must support thin-walled ceramics carefully during grinding. Stable setups prevent vibrations and flexing, which can cause cracks or breakage. Use rigid fixtures that hold the part securely but do not squeeze too tightly. Soft jaws or vacuum fixtures work well because they spread pressure evenly and reduce stress on the ceramic.
You should avoid plunging the tool straight into the part. Instead, use gentle entry moves like ramping or helixing. These methods help you avoid sudden shocks. Keep the tool in constant contact with the ceramic to prevent interruptions that might cause chipping. High-frequency stepovers, where you take many small, consistent passes, also help protect the part.
Before you start, check for internal stress in sintered ceramics. Make light passes first to relieve tension. You can use mist cooling or air blasts to manage dust and keep the tool cool. This helps you avoid thermal shock, which can damage the ceramic.
Tip: Always use extra supports for thin or fragile sections. This prevents bending or breaking during grinding.
Handling Tips to Minimize Stress and Cracks
Proper handling is important when you grind thin-walled ceramic parts. Use lower feed rates and cutting speeds to avoid shocking the material. Keep cutting passes shallow to prevent overheating. Allow the ceramic to cool between passes. This helps release heat and reduces the risk of cracks.
Support the workpiece with soft jaws or vacuum fixtures. Minimize clamping pressure to avoid stress fractures. Avoid sharp corners in your toolpath because they create stress points. Try to round off edges instead. Use coolants and lubricants to keep the temperature low and prevent cracks.
You should always support thin or fragile parts with extra fixtures. Avoid pointy edges and sharp corners to improve durability. Handle each part gently and check for signs of stress or damage as you work.
If you follow these steps, you can grind thin-walled ceramic parts safely and achieve high-quality results.
Step-by-Step Process for Safe Grinding
Preparing and Inspecting Before Grinding
You must prepare your workspace and tools before you start. Clean your grinding area and check your equipment. Make sure your diamond grinding wheel is in good condition. Inspect the ceramic part for cracks or chips. You want to avoid starting with a damaged piece.
Use the following steps to get ready:
| Step | Description | Importance |
|---|---|---|
| Fine grinding | Smooths out rough surfaces. | Ensures tight tolerances (often within ±0.01mm). |
| Laser cutting | Makes delicate cuts without putting stress on part. | Reduces risk of damage to thin-walled parts. |
| Core drilling | Adds precise holes for fasteners or fluid flow. | Essential for assembly function. |
| Cooling & Lubrication | Prevents overheating and reduces friction. | Avoids thermal stress and micro-cracks. |
| Final Inspection & Quality Control | Checks for accuracy and defects. | Ensures part meets design specs. |
| Optional Post-Processing | Includes polishing and coatings. | Enhances performance and appearance. |
Check your coolant system. Fill it with clean fluid. Set up your fixturing to hold the ceramic part gently but firmly. You want to avoid too much pressure.
Executing Controlled Grinding and Monitoring
Start grinding with slow, gentle passes. Remove a small amount of material each time. Do not rush. Patience helps you avoid cracks and chips. Watch the grinding wheel. If you see too much dust or hear strange noises, stop and check your setup.
Never overload the wheel. Take breaks to let the ceramic cool. Use coolant to keep the temperature low. Monitor the surface for any signs of damage.
Magnetic Barkhausen noise measurement is a non-destructive method for fast inspection of machined surfaces during grinding. In-process measurements help you detect early signs of damage and control the process. This technique lets you tell the difference between damaged and undamaged surfaces.
Stay alert as you grind thin-walled ceramic parts. If you notice any change in sound or vibration, pause and inspect the part. Careful monitoring and gradual material removal will help you achieve a smooth, crack-free finish.
Common Mistakes and How to Prevent Them
Overloading, Excessive Force, and Improper Tool Use
You can make mistakes when grinding thin-walled ceramic parts. Overloading the grinding wheel is a common error. If you push too much material at once, you risk cracks and chips. Excessive force can break the ceramic. You must use gentle pressure and slow feed rates.
Improper tool use also causes problems. If you use the wrong grinding wheel or a worn-out tool, you lose precision. Aimgrind diamond grinding wheels give you the best results. You should always check the wheel for wear before you start. Neglecting support leads to vibration and flexing. You need stable fixtures to hold the part firmly.
Here is a quick checklist to help you avoid these mistakes:
- Use light pressure and slow feed rates.
- Select the correct diamond grinding wheel for ceramics.
- Inspect tools for wear or damage.
- Support the part with rigid fixtures.
| Mistake | Result | Prevention Tip |
|---|---|---|
| Overloading | Cracks, chips | Remove material gradually |
| Excessive force | Breakage | Apply gentle pressure |
| Wrong tool | Poor finish, damage | Use Aimgrind diamond wheels |
| Lack of support | Vibration, flexing | Use stable fixtures |
Tip: Always start with a careful setup. Double-check your tools and supports before grinding.
Recognizing Signs of Impending Breakage and Immediate Actions
You must watch for signs that the ceramic part is about to break. If you hear unusual noises or see dust clouds, stop the machine. Surface cracks or chips mean trouble. You should inspect the part right away.
If you notice vibration or movement, check your fixture. Tighten or adjust it to keep the part stable. If the grinding wheel slows down or skips, reduce the feed rate. Let the ceramic cool between passes.
Here are warning signs and actions you can take:
- Loud noises or sudden vibrations
- Visible cracks or chips
- Excessive dust or heat
| Warning Sign | Immediate Action |
|---|---|
| Loud noise | Pause and inspect setup |
| Surface crack | Stop and check the part |
| Vibration | Adjust fixture and supports |
| Overheating | Add coolant and slow down |
Note: Quick response prevents breakage. Stay alert and act fast if you see any warning signs.
You achieve the best results when you grind thin-walled ceramic parts by choosing Aimgrind diamond grinding wheels, optimizing your process parameters, and supporting your parts with care. You reduce breakage risk by managing thermal changes, using advanced fixturing, and planning smooth toolpaths.
| Strategy | Description |
|---|---|
| Thermal Management | Pulsed cooling and cryogenic mist prevent thermal shock. |
| Advanced Fixturing | Hydrostatic chucks and viscoelastic pads lower stress concentration. |
| Toolpath Optimization | Constant chip load and smooth transitions minimize fractures. |
Proper support and stabilization techniques give you long-term benefits. You improve mechanical properties by using the right stabilizer, controlling grain size, and keeping residual stress low. Adding cerium oxide to zirconia increases thermal stability and lets the material bend before breaking.
Stay patient and methodical. You protect your parts and ensure high-quality results when you follow these steps.
FAQ
What is the best grinding wheel for thin-walled ceramics?
You should use a diamond grinding wheel from Aimgrind. These wheels give you high precision and long life. They help you avoid cracks and chips in your ceramic parts.
How do you prevent cracks during grinding?
You must use slow speeds and light pressure. Always add coolant to keep the part cool. Support the ceramic with soft jaws or vacuum fixtures.
Can you grind ceramics dry, or do you need coolant?
You should always use coolant. Coolant keeps the ceramic cool and prevents thermal cracks. Wet grinding gives you a smoother finish and protects your part.
How do you know if your grinding wheel needs replacement?
Check for uneven wear or loss of sharpness. If you see more dust or hear strange noises, replace the wheel. A fresh wheel gives you better results.
What safety tips should you follow when grinding ceramics?
- Wear safety glasses and gloves.
- Keep your workspace clean.
- Check your tools before you start.
Tip: Stay alert for any changes in sound or vibration.