You can prevent dangerous grinding accidents. The single most important step for your safety is the ring test. You perform this check before mounting any vitrified bond grinding wheel 4 inches or larger.
A clear, ringing sound from a gentle tap means the wheel is safe for grinding. A dull thud indicates a dangerous, hidden crack.
You must discard a damaged wheel immediately. This simple test is your most critical safety action. It is the first step in preventing catastrophic failure during a grinding operation.
Key Takeaways
- Always do a ring test on grinding wheels 4 inches or larger before you use them. A clear ring means the wheel is safe. A dull thud means it is cracked and you must throw it away.
- Always check the wheel for damage and make sure it fits your grinder. Also, check the grinder’s safety guards and flanges before you mount the wheel.
- Mount the wheel carefully. Use blotters between the wheel and flanges. Tighten the nut just enough so the wheel is firm but not too tight.
- Stand to the side for one minute after starting a new wheel. This protects you if the wheel breaks. Always use the work rest and wear safety gear.
- Keep your grinding wheel in good shape. Truing makes it round and dressing cleans its surface. This helps the wheel work well and keeps you safe.
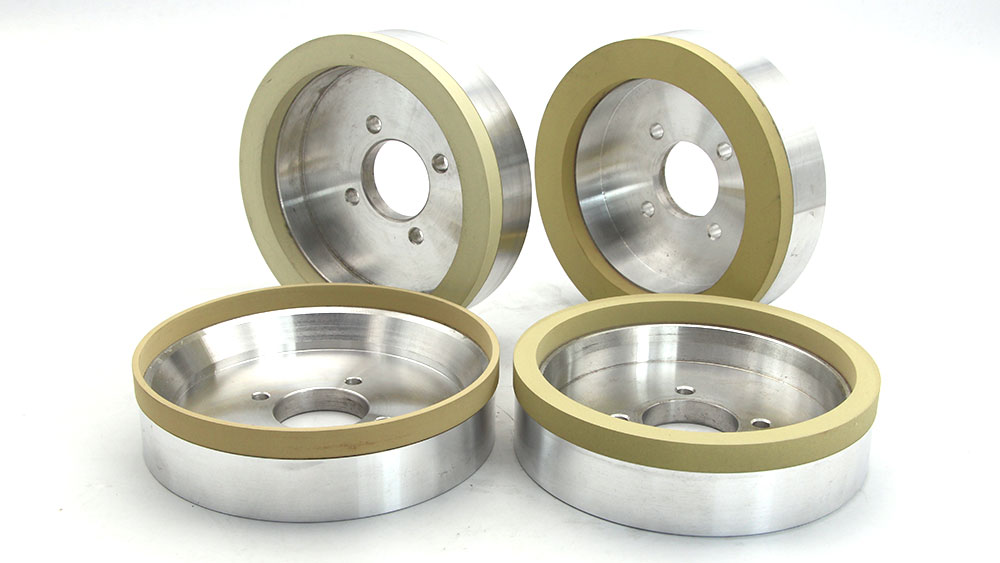
Essential Safety Checks for Your Vitrified Bond Grinding Wheel
Your commitment to workplace safety begins before the grinder ever powers on. A few minutes of inspection can prevent a serious accident. These checks are non-negotiable safety directives for every grinding operation.
The Visual Inspection Checklist
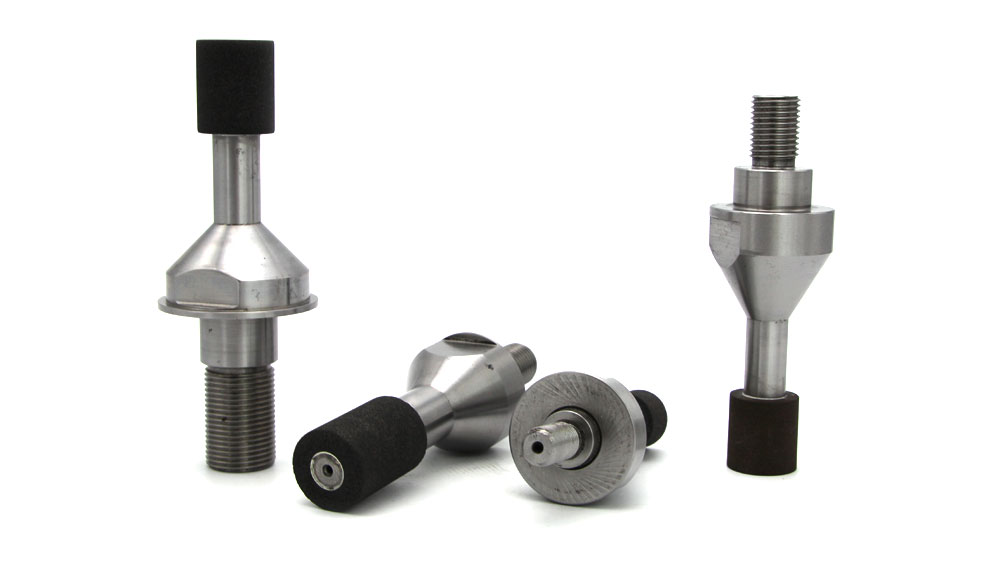
You should always start with a thorough visual check. While all wheels need this inspection, you can reduce initial risks when you select the grinding wheel from a specialized brand. High-quality products from Aimgrind ensure better manufacturing consistency, but your inspection remains a critical safety step.
Federal regulations underscore the importance of this check.
OSHA standard 1926.303(c)(7) requires that you closely inspect and ring-test all abrasive wheels before mounting. This ensures they are free from cracks or defects.
Use this checklist to guide your visual inspection:
- Look for Damage: Carefully examine the entire wheel for any cracks, chips, or gouges.
- Check for Discoloration: Dark spots can indicate heat damage from previous use, which compromises the wheel’s structure.
- Verify Dimensions: Use a ruler or calipers to confirm the wheel’s outer diameter and thickness match your grinder’s specifications.
- Inspect the Arbor Hole: Ensure the center hole is clean and free of any damage or debris before you attempt to mount it.
Performing the Ring Test
The ring test is your best defense against hidden fractures inside a vitrified bond grinding wheel. You must perform this test on any wheel 4 inches or larger. Follow these steps for a reliable test:
- Make sure the wheel is dry and clean. Suspend it using a pin or your finger through the arbor hole so it hangs freely.
- Take a light, non-metallic object, like the plastic or wooden handle of a screwdriver.
- Gently tap the wheel about 1 to 2 inches from its edge. Tap it at a point 45 degrees from the top center line.
- Rotate the wheel 45 degrees and tap it again. A solid, undamaged wheel will produce a clear ringing sound. A dull thud means the wheel is cracked and you must discard it immediately. Your safety depends on it.
Proper Handling Grinding Wheels
Proper handling is essential for your safety. Think of a vitrified bond grinding wheel like a ceramic dinner plate. It is hard but brittle.
An industry expert explains, “Handle it as you would a dinner plate, because if you treat it badly, it’s apt to get a catastrophic crack and quite possibly break apart during use.”
Aimgrind’s vitrified bond grinding wheels are engineered for durability and long life, but this strength does not make them immune to damage from mishandling. Careful handling grinding wheels is a non-negotiable rule for user safety.
Follow these rules for storing and handling grinding wheels:
- Carry, Don’t Roll: Never roll a wheel on its edge. Carry it carefully to prevent bumps or drops.
- Store Correctly: Place wheels on shelves or in bins. Use cardboard or wood dividers to keep them from touching each other.
- Avoid Bad Environments: Store your wheels in a dry area. Never leave them in wet, humid, or icy locations. Exposure to moisture or freezing temperatures can weaken the wheel’s structure and create a major hazard during grinding.
- Practice Safe Transport: Use a cart or other conveyance for large wheels. This provides support and protection during movement. Proper handling grinding wheels is a simple but effective way to ensure a safe grinding experience.
The Correct Mounting Procedure
Properly mounting the wheel is just as critical as the ring test. A mistake here can lead to wheel failure, even if the wheel itself is perfect. This procedure ensures the wheel is secure, balanced, and ready for safe operation. Your attention to detail during this process is a direct investment in your personal safety.
Preparing the Grinder and Flanges
Before you even touch the new wheel, you must inspect the grinder itself. This step is a crucial part of routine machine maintenance. First, ensure the grinder is unplugged and completely powered off. You should then check that the machine’s RPM rating does not exceed the maximum safe speed printed on the wheel’s label.
Next, you must inspect the machine’s safety guards and flanges. All guards must be in place and correctly adjusted before you begin any grinding work.
- Side Guards: These must cover the spindle, nut, and flanges. They should also cover at least 75% of the wheel’s diameter.
- Work Rest: You must keep the work rest adjusted to within 1/8-inch of the wheel. This prevents the workpiece from being pulled into the gap.
- Tongue Guard: The adjustable tongue guard at the top of the grinder must be kept within 1/4-inch of the wheel.
Finally, examine the flanges. These are the discs that hold the wheel on the spindle. Check them for any dirt, burrs, or warping. Clean, flat flanges are essential for applying even pressure to the wheel.
Step-by-Step Wheel Mounting
With the grinder prepared, you can now proceed with mounting the wheel. A key component in this process is the blotter. Blotters are the compressible paper or cardboard washers that fit between the wheel and the flanges. You must always use them.
According to U.S. regulations, “(i) Blotters (compressible washers) shall always be used between flanges and abrasive wheel surfaces to insure uniform distribution of flange pressure.”
Blotters are essential for three main reasons:
- Even Pressure: They distribute the clamping pressure from the flanges evenly across the wheel’s surface. This prevents stress points that can cause cracks.
- Vibration Dampening: They act as cushions, absorbing vibrations during grinding. This leads to a better finish and reduces wear on the machine.
- Protective Barrier: They prevent direct, hard contact between the metal flanges and the abrasive surface of the vitrified bond grinding wheel.
Slide the inner flange onto the spindle, followed by a clean blotter. Carefully slide the wheel onto the spindle. Place the second blotter on the outside of the wheel, followed by the outer flange.
Tightening the Nut Correctly
The final step is securing the assembly by tightening the spindle nut. How you tighten this nut is critical. Improper tightening is a primary cause of wheel breakage.
- Under-tightening is dangerous. A loose nut will allow the wheel to wobble or spin on the spindle, creating an unstable and hazardous grinding condition.
- Over-tightening is also extremely dangerous. Applying too much force with the wrench can create excessive, uneven pressure. This stress can fracture the wheel, causing it to break apart at high speed.
You should tighten the nut just enough to hold the wheel firmly without distorting the flanges. The wheel should not be able to move on the shaft by hand. After tightening, give the wheel a gentle spin by hand. It should rotate freely without any wobble. This careful approach to mounting the wheel ensures your equipment is secure and your safety is prioritized.
Safe Grinding Operation Techniques
Your safety practices must continue after the wheel is mounted. Proper operating techniques are essential safety directives that prevent accidents during the grinding process. Always wear your personal protective equipment (PPE) before you start the machine. This includes safety glasses, a face shield, and any other required PPE.
The One-Minute Startup Rule
You must follow a critical safety rule after mounting a new wheel. Most wheel failures happen within the first minute of operation. This is when hidden defects or mounting stresses are most likely to cause a catastrophic break.
Stand to the side of the grinder, never in front of it, for one full minute after you turn it on. Let the wheel run at its full operating speed.
This simple action protects you from flying debris if the wheel fails. If the wheel runs smoothly for that minute, you can then proceed with your grinding work. This practice is a fundamental part of your overall safety.
Correct Grinding Posture
Your posture during grinding is crucial for both immediate safety and long-term health. Poor posture can lead to serious musculoskeletal injuries over time. You can avoid these issues by maintaining a balanced and stable stance. Stand with your feet shoulder-width apart and keep your back straight. This helps prevent common problems such as:
- Neck pain and tension headaches from leaning forward.
- Shoulder strain, including rotator cuff tendinitis.
- Lower back pain from slouching or hunching.
Correct posture ensures you have full control over the workpiece and reduces fatigue, which helps prevent grinding accidents.
Using the Work Rest Safely
The work rest provides the stability needed for precise grinding. You must always use it. Adjust the work rest so there is no more than a 1/8-inch gap between it and the grinding wheel. A larger gap can cause the workpiece to get jammed between the rest and the wheel. This can damage the wheel, injure you, or launch the workpiece at high speed.
Before you begin grinding, double-check that the wheel’s speed is correct. The grinder’s RPM must not exceed the maximum allowable speed marked on the wheel. Exceeding the maximum allowable speed is extremely dangerous and a primary cause of wheel explosions. Your attention to the wheel’s speed and the work rest position is vital for your safety. Always wear your PPE.
Wheel Maintenance for Peak Performance
Proper wheel maintenance ensures both safety and high-quality results. Over time, a wheel’s shape and surface change. Regular maintenance restores its condition for optimal precision grinding. You must learn proper dressing and truing techniques. This routine machine maintenance is essential for peak performance.
Truing for Concentricity
Truing makes your grinding wheel perfectly round. This process restores the wheel’s concentricity, which is the alignment between its rotational axis and its geometric center. Correct concentricity is vital for precision. Even small errors can cause:
- Harmful vibrations during grinding
- Imbalance in the wheel
- Accelerated wear on the wheel and machine
You can true your wheel using tools like a multi-point diamond dresser. This step ensures the wheel runs smoothly, which is fundamental for any precision grinding task.
Dressing to Restore Cutting Surface
Dressing cleans and sharpens the wheel’s cutting surface. During grinding, the wheel can become “loaded” with material debris or “glazed” as abrasive grains become dull. This happens when you grind hard materials or use the wheel for a long time. A glazed wheel loses its cutting ability.
You must dress the wheel to fix this. Dressing removes the dull layer and exposes fresh, sharp abrasive grains. This action restores the wheel’s cutting efficiency and helps you achieve a smooth surface finish on your workpiece. Regular dressing is a key part of your maintenance schedule.
Using Aimgrind Expertise for Dressing
For advanced vitrified bond grinding wheels, like those with CBN abrasives, you need specialized methods. A motorized dresser is the most effective tool for these high-performance wheels. This reflects Aimgrind’s expertise in customized solutions for precision grinding. You should also use coolant during grinding. Coolant minimizes thermal damage to your workpiece, a key benefit of using high-quality vitrified grinding wheels. When you dress the wheel correctly, you ensure your vitrified bond grinding wheel delivers consistent precision.
Your commitment to grinding safety prevents serious accidents and injuries. These final safety directives are your promise to prioritize safety above all else. Make this your Final Safety Commitment for every grinding job.
- Perform the Ring Test: You must always test the wheel before mounting.
- Match the Speed: Ensure the grinder’s speed never exceeds the wheel’s maximum safe speed. Your safety depends on the correct speed.
- Use All Guards: Keep every safety guard in its proper place.
- Maintain the Wheel: Proper truing and dressing ensure peak performance and safety.
Your safety is not negotiable. If you have any doubt about a wheel’s integrity, discard it. A new wheel is always cheaper than an injury.
FAQ
When should you perform the ring test?
You must perform the ring test before mounting any vitrified wheel 4 inches or larger. You should also test any wheel that has been dropped. This simple check finds hidden cracks and prevents accidents.
What is the safe distance for the work rest?
You must keep the work rest adjusted to within 1/8-inch of the grinding wheel. A wider gap can trap your workpiece. This can damage the wheel and cause a serious injury.
What materials can Aimgrind’s vitrified wheels grind?
You can use Aimgrind vitrified bond grinding wheels for many hard materials. They are ideal for precision grinding on hard metals, ceramics, and composites. Their durability ensures consistent performance for demanding jobs.
What is the difference between truing and dressing a wheel?
Truing makes the wheel perfectly round for balance and precision. Dressing cleans the wheel’s surface and exposes sharp new abrasives. You need to do both for safety and peak performance. ✅
See Also
Mastering Your Dremel Grinding Wheel: Safe and Effective Usage Guide
Understanding CBN Grinding Wheels: Their Function and Operational Principles Explained
Selecting the Optimal Bench Grinding Wheel Material for Your Specific Requirements
Exploring Various Grinding Wheel Types and Their Real-World Practical Uses
Finding the Ideal Grinding Wheel Dresser That Perfectly Suits Your Needs