You can master handheld grinding. Developing skill in this area is crucial. It helps prevent dangerous kickback and loss of control. This essential skill is built on three pillars for safe, effective work:
- Proper equipment setup
- Stable body mechanics
- Deliberate material removal techniques
Mastering these basics allows you to work with greater precision. Your control over the grinding process will improve significantly.
Key Takeaways
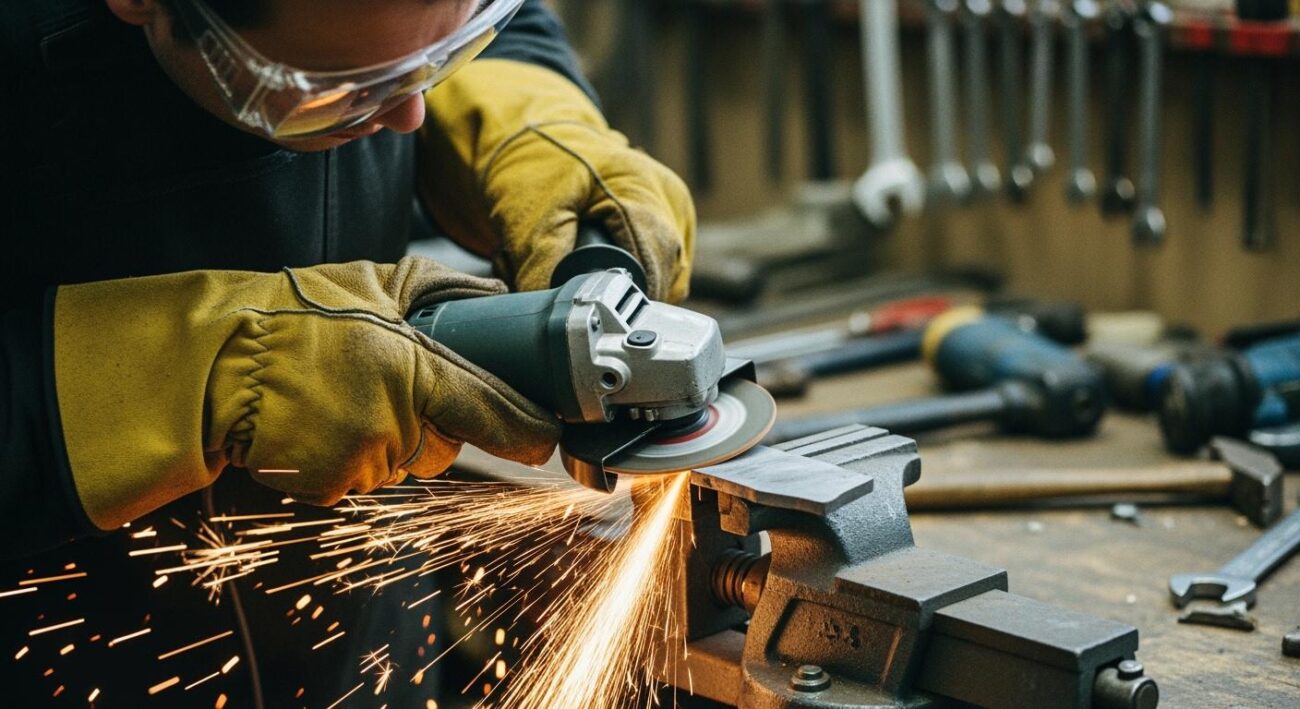
- Always use proper safety gear. This includes eye protection, a respirator, ear protection, and gloves. This keeps you safe from harm.
- Secure your workpiece tightly with clamps or a vise. Never hold it by hand. This prevents accidents and helps you control the grinder.
- Use a two-handed grip and a stable body stance. This gives you better control over the tool. It also helps prevent kickback.
- Apply light, steady pressure when grinding. Let the tool do the work. Too much pressure can damage your work and the tool.
- Practice regularly to improve your skills. Use scrap metal to trace lines. This builds muscle memory for better control.
Foundations for Safe Handheld Grinding
A solid foundation in safety and setup is non-negotiable for any handheld grinding work. Before you even power on your tool, you must prepare your personal protective equipment (PPE), your workpiece, and your grinding equipment. These steps prevent accidents and set the stage for controlled, precise results.
Essential PPE for Grinder Safety
You must protect yourself from common hazards. Federal regulations require specific PPE for grinding operations. Your most critical protection is for your eyes and face. Always wear safety glasses with polycarbonate lenses and side shields. For maximum safety, add a face shield over your glasses. Both items must have a “Z87+” mark, which shows they can withstand high-impact debris.
Safety Tip: OSHA requires employers to ensure all PPE fits each employee properly. Ill-fitting gear is not compliant and compromises your safety.
Beyond eye protection, consider other risks.
- Airborne Dust: Use a NIOSH-approved respirator (N95 or better) to protect your lungs.
- Noise: Wear earplugs or earmuffs to prevent hearing damage from loud handheld power tools.
- Hand Injuries: Use heavy-duty gloves suitable for handling abrasive materials.
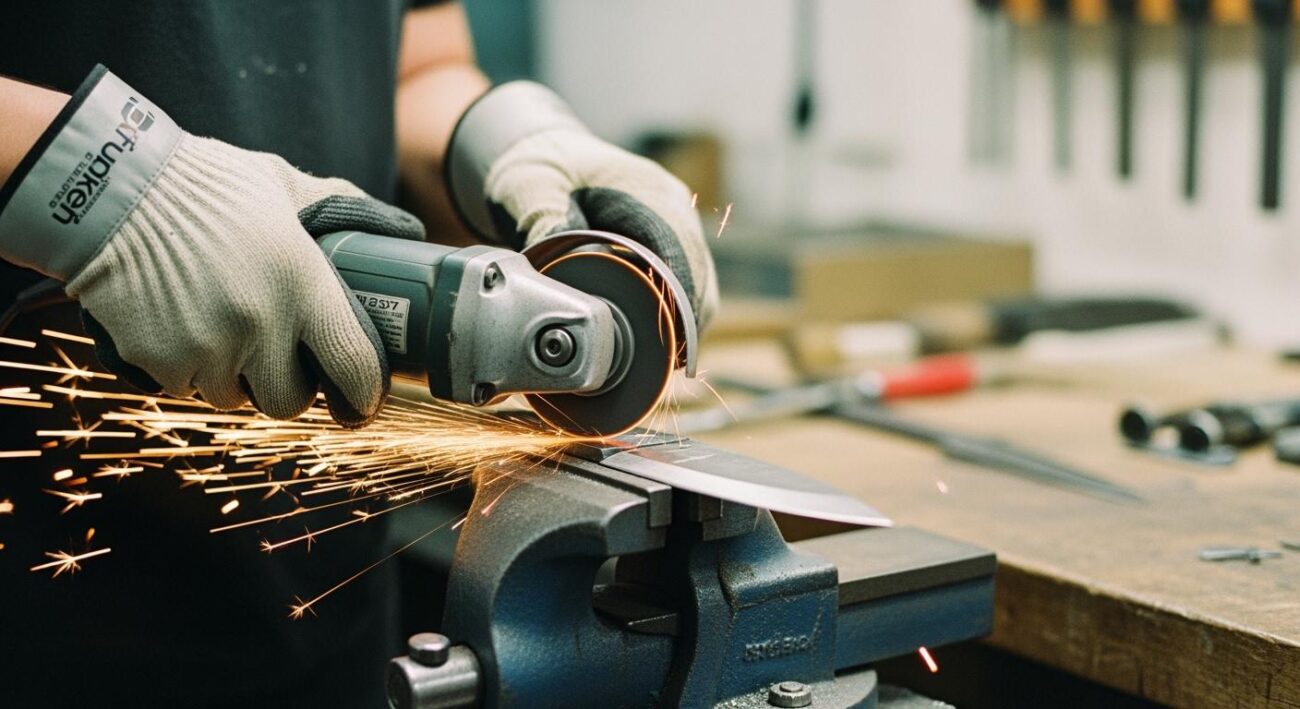
Secure Clamping Techniques
Your workpiece must be completely stable. Never hold a part with one hand while grinding with the other. You should always secure your material with clamps or a vise. For irregularly shaped parts, you may need special tools like step clamps or fixture plates to get a firm grip. Magnetic chucks are another excellent option for holding ferrous metals securely. If you are working on a tall piece, support it by clamping it to an angle plate or a 1-2-3 block to prevent it from tipping during grinding.
Choosing Your Grinding Equipment
Selecting the right tools is a key part of safety. The most important rule for handheld power tools involves speed ratings. The RPM (Revolutions Per Minute) rating on your grinding wheels must be equal to or higher than the RPM rating of your grinder. Using wheels with a lower RPM rating than your tool can cause them to break apart violently.
This is why you must match the wheel diameter to the grinder. For example, never try to fit a 6-inch wheel on 4.5-inch angle grinders. Doing so requires removing the safety guard, which dramatically increases your risk of injury. Proper selection of grinding equipment and wheels ensures your tools perform as designed for all your tasks. Following these safety guidelines for handheld grinding is essential.
Core Techniques for Controlled Grinding
Good setup is only half the battle. Your control over handheld power tools comes from your body. Proper technique turns a powerful tool into a precise instrument. These core techniques will help you build the muscle memory needed for clean, safe, and efficient work.
Mastering Your Stance and Body Position
Your body is the foundation for control. You must position yourself to absorb the tool’s force and react to its movements. Think of it like an athletic stance. This stable posture helps you stay balanced and anticipate the grinder’s rotational energy.
A solid stance for handheld grinding involves several key points:
- Foot Placement: Place your feet shoulder-width apart. One foot should be slightly forward. This creates a stable base to brace against the tool.
- Balanced Weight: Center your weight between your feet. Avoid leaning too far forward or backward. A balanced posture allows you to adjust smoothly as you work.
- Stay Out of the Line of Fire: Always position your body to the side of the grinding wheel’s rotational path. Never stand directly behind it. This ensures that if a wheel breaks, the fragments will fly away from you.
Pro Tip: Keep your arms slightly bent and close to your body. This gives you more leverage and control over the tool compared to working with your arms fully extended.
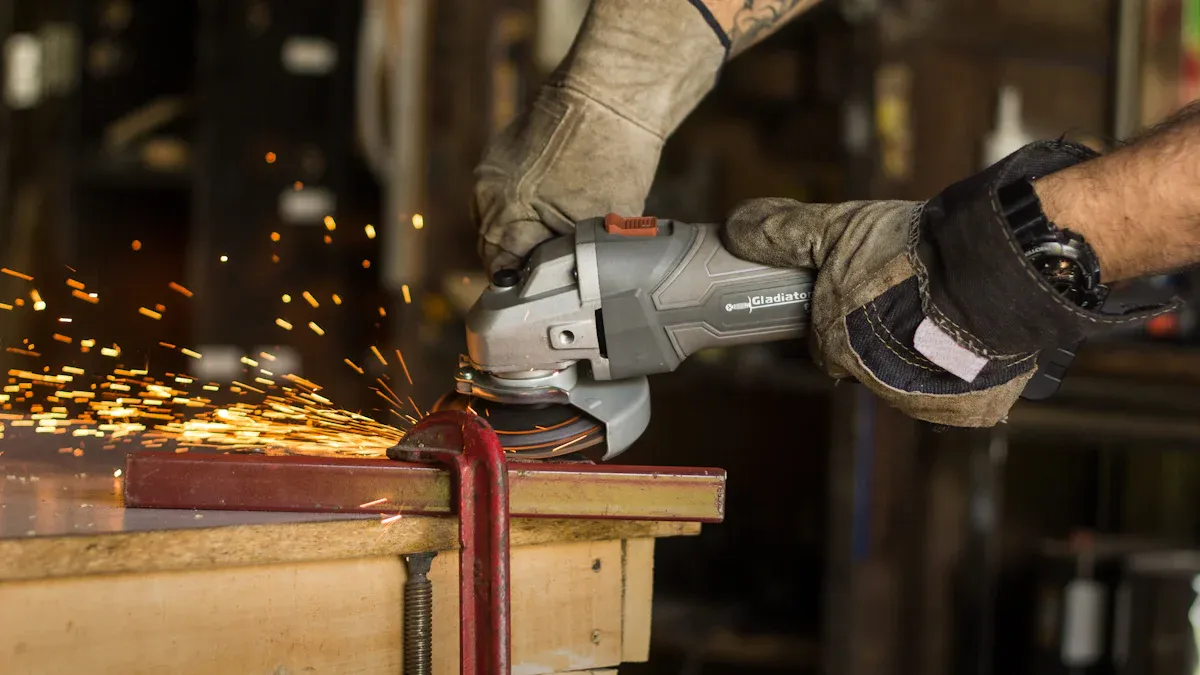
The Two-Handed Grip for Stability
You should always use two hands to operate angle grinders. A two-handed grip is your primary defense against kickback and loss of control. One hand holds the main body of the grinder, while the other firmly grips the side handle.
This method provides several advantages. A full-wrap grip, where your fingers can lock securely around the tool, prevents slippage. This is especially important when your hands get sweaty or oily. Using the detachable side handle engages both hands in the operation. This two-handed approach gives you superior leverage to manage the powerful forces of grinding and helps prevent severe tool rotation if the wheel binds. These ergonomic grips reduce muscle tension and allow you to work longer with less fatigue.
Managing Grinder Angle and Pressure
The angle of the grinder and the pressure you apply directly impact your results. These two factors determine the speed of material removal and the quality of the surface finish. Mastering them is essential for all grinding procedures.
The angle of the grinding wheel to the workpiece is critical.
- For rapid material removal: Use a steeper angle (e.g., 15-30 degrees). This is more aggressive but can wear out your wheels faster.
- For smooth finishing: Use a shallower angle (e.g., 5-15 degrees). This is less aggressive and gives you a finer finish.
Let the weight of the tool do most of the work. Applying excessive pressure is counterproductive and dangerous. It can cause many problems:
- It generates extreme heat, which can damage both the workpiece and the grinding wheel.
- It can cause the abrasive grains to dull quickly or force material into the wheel, a problem known as “loading.”
- It leads to uneven wear on the wheel, which can make the tool vibrate and become unbalanced.
- Most importantly, inconsistent pressure results in an uneven, gouged surface.
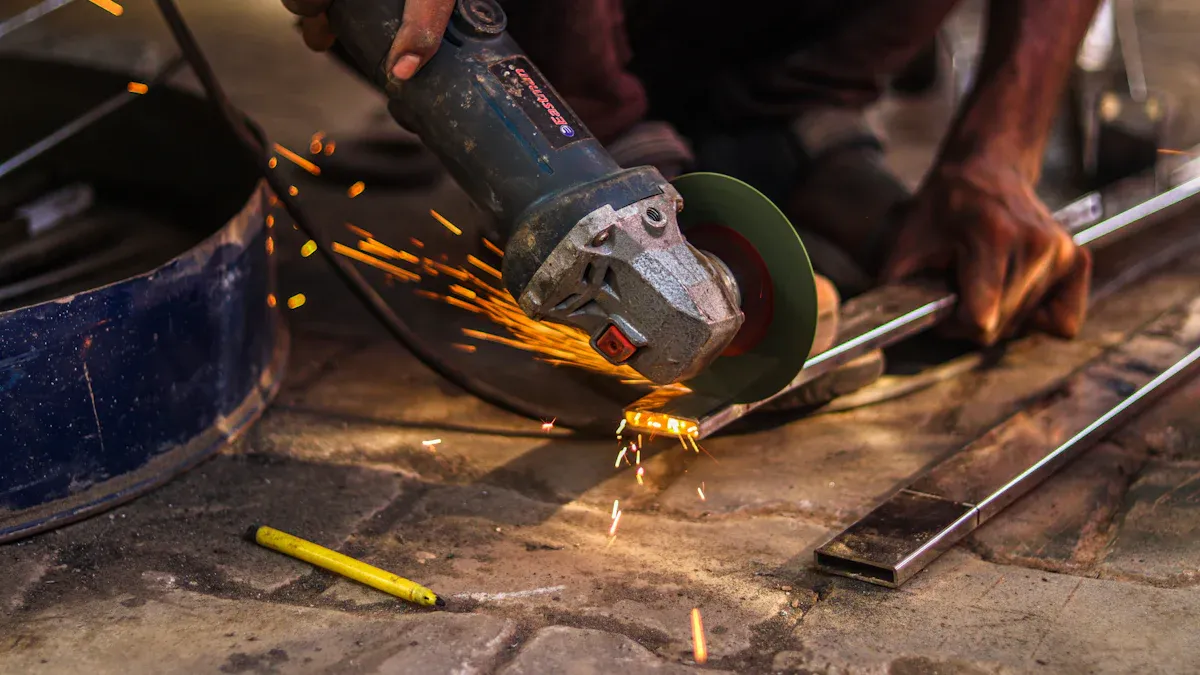
Pulling vs. Pushing Movements
The direction you move the grinder affects your control and the quality of your cut. Both pulling and pushing motions have their place in handheld grinding. Knowing when to use each one will improve your precision.
Many operators find that a pulling stroke (moving the grinder toward your body) offers great control when starting a cut or breaking a fresh, sharp edge. This motion allows you to see your line clearly and eases the wheel into the material.
Once the edge is broken, a pushing stroke (moving the grinder away from your body) is often better for steady material removal. With these tools, the wheel typically rotates toward you, so a pushing motion works with the tool’s rotation, helping to pull it into the material for an efficient cut. Combining these movements gives you a systematic approach to your grinding tasks.
Advanced Techniques for Precision Grinding
Once you master the basics, you can move on to advanced techniques for precision work. These methods help you create a professional finish on complex jobs. You will learn to blend surfaces seamlessly and work in tight spaces with specialized tools.
Blending Welds and Feathering Edges
Blending a weld makes it disappear into the surrounding metal. This requires a delicate touch and the right equipment. Flap discs are excellent tools for this job. Your choice of grit is important for getting a clean finish without damaging the surface.
- For heavy weld removal: You can start with a 40 or 60 grit flap disc. These are aggressive and remove material quickly.
- For a superior finish: You should switch to an 80 grit flap disc. This finer grit smooths the surface and helps you feather the edge of the grind into the parent metal.
Pro Tip: When working with stainless steel, always use ceramic or zirconia flap discs. These prevent contamination that can cause rust or discoloration on your final product.
Using Aimgrind Mounted Points for Intricate Work
Some jobs require grinding in very small or awkward areas. For these tasks, standard wheels are too large. This is where mounted points become essential tools for precision work. Aimgrind offers a wide variety of mounted points for detailed cutting, shaping, and finishing. These small grinding heads fit into rotary tools and give you amazing control.
Different shapes handle different tasks. Ball-shaped points are perfect for polishing curved surfaces. Cylindrical and conical points allow you to reach into tight corners for deburring. Aimgrind provides mounted points in different materials for your specific needs:
| Abrasive Material | Best For | Common Applications |
|---|---|---|
| Diamond | Hard, non-metal materials (ceramics, glass) | Internal grinding, deburring |
| CBN | Tough metals (tool steel, hardened steel) | Precision grinding, shaping |
This versatility makes them invaluable for metalworking, woodworking, and other crafts that demand a perfect finish. Whether you are doing cutting tasks or fine finishing, these tools help you achieve high-quality results.
Specialized Roll Grinding and Finishing
Roll grinding is a specialized process used to create a perfectly smooth and cylindrical surface on a roll. This technique is critical in industries like printing and manufacturing. The final steps of roll grinding focus on achieving the exact surface finish requirements.
After the initial grinding, you will perform a finishing process. This often involves sanding the roll. You might use sandpaper with a grit between 180 and 320 to carefully remove any lead marks left by the grinding wheel. This final sanding step is crucial for creating a flawless surface. Proper roll grinding requires patience and the right roll grinding equipment to get the job done correctly. The goal of roll grinding is a uniform finish across the entire roll.
Developing Skill Through Practice and Troubleshooting
Consistent practice is the only way to become an expert. Developing skill in grinding comes from repeating correct motions until they become second nature. This section will guide you through drills and troubleshooting common problems.
Drills to Build Muscle Memory
You can build muscle memory with simple exercises. Find a piece of scrap metal to practice on. Use a marker to draw straight lines, squares, and circles. Your goal is to trace these lines with the grinder.
Practice Drill: Start by pulling the grinder along a straight line. Then, try pushing it. Focus on keeping a consistent angle and light pressure. These simple tasks build the foundation for more complex work.
Fixing Common Grinding Mistakes
Every operator makes mistakes. Knowing how to fix them is part of developing skill. Two common issues are kickback and heat discoloration.
Kickback is a sudden, violent reaction where the tool jumps back at you. You can prevent it by:
- Ensuring your grinding wheel is sharp and not dull or loaded.
- Using a proper two-handed grip and stable stance.
- Never removing the safety guard from your tool.
You might also see blue or brown marks on your metal. This discoloration means you are creating too much heat. This can weaken the part. To fix this, you should reduce your grinding pressure, check that your wheel is clean, and ensure your grinding procedures are correct for the material.
Correcting Gouges and Uneven Surfaces
An uneven finish is a common problem for beginners. You can fix gouges and create a flat surface using a cross-hatch pattern. This technique makes high and low spots easy to see.
First, perform your grinding passes in one direction. Next, change your direction by 90 degrees and grind across your first set of marks. This cross-hatching shows you where the surface is uneven. Continue this process, applying light pressure, until you see a uniform pattern across the entire workpiece. A consistent cross-hatch pattern is proof that you have achieved a flat, even finish. This is a key part of developing skill in precision grinding.
Your journey in developing skill in handheld grinding rests on three pillars: a secure setup, stable body mechanics, and deliberate technique. Mastery comes from mindful practice, not natural talent. Always prioritize safety above all else. As you improve, specialized tools can help you achieve greater precision and a perfect finish. Continue practicing to refine your control, and you will produce a high-quality finish on every project. This dedication to the grinding process ensures a professional finish with the right tools.
FAQ
What is the most important rule for matching a wheel to a grinder?
You must check the RPM (Revolutions Per Minute) ratings. The RPM rating on your grinding wheel must be equal to or higher than your grinder’s maximum RPM. This prevents the wheel from breaking apart during use. Always match the wheel diameter to the grinder’s guard size.
How much pressure should I use when grinding?
You should apply light, consistent pressure. Let the weight of the tool do most of the work. Pushing too hard creates excess heat, which can damage your workpiece and wear out your grinding wheel quickly. A gentle touch gives you better control and a smoother finish.
When should I use mounted points instead of a larger wheel?
You should use mounted points for detailed work in tight spaces. They are perfect for tasks like deburring, polishing, and carving inside corners or on complex shapes. Aimgrind offers a variety of mounted points for precision jobs where larger wheels cannot reach.
How can I fix an uneven or gouged surface?
You can fix an uneven surface using a cross-hatch pattern. Grind in one direction, then grind again at a 90-degree angle to your first passes. This technique reveals high and low spots. Continue with light pressure until you achieve a uniform, flat finish.