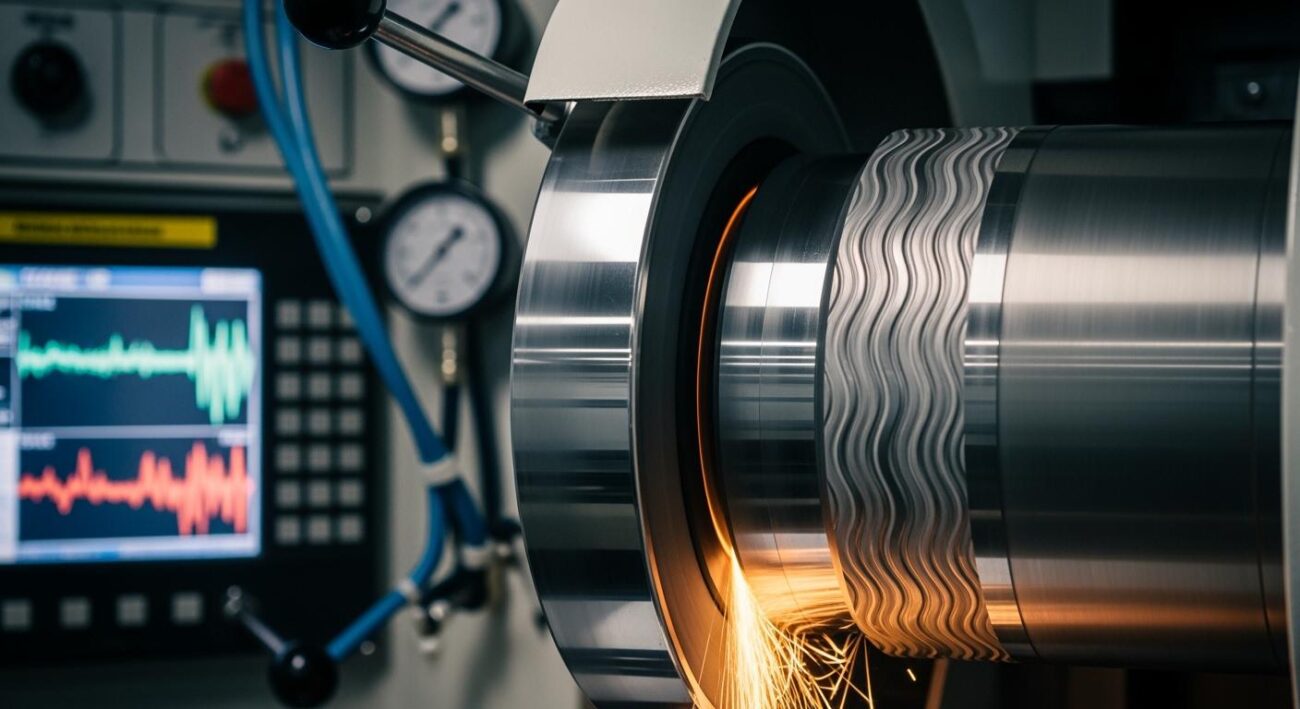
Achieving tight tolerances is the goal of every cylindrical grinding process. However, taper and roundness errors are common challenges. These issues can prevent parts from meeting specifications, where precision often must be controlled within 0.0001 inches. You can correct taper and roundness errors by diagnosing their source. The root cause of poor cylindrical form typically falls into one of three categories:
- Improper workpiece setup and alignment
- Machine deflection and misalignment
- Incorrect grinding wheel and dressing procedures
This guide provides direct steps to identify and fix issues in your grinding operation.
Key Takeaways
- Check workpiece centers and machine alignment first. Make sure the workpiece is set up correctly and the machine parts are straight.
- Use a steady rest for long parts. This stops them from bending during grinding.
- Choose the right grinding wheel and dress it well. A good wheel and proper dressing make the surface smooth and accurate.
- Keep clamping pressure just right. Too much or too little pressure can make parts uneven or out of round.
How to Correct Taper and Roundness Errors
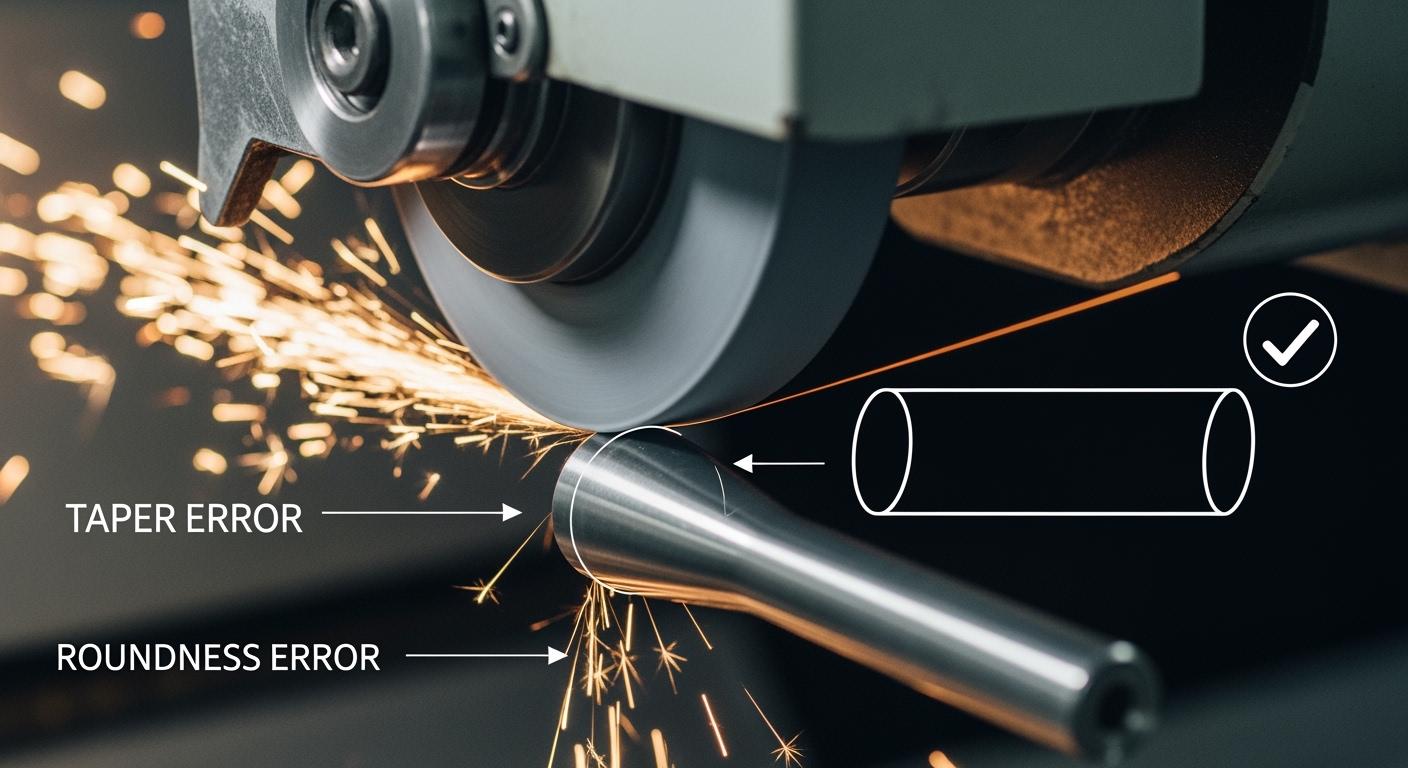
Taper is a gradual change in diameter along the length of a workpiece. Out-of-roundness means the part is not perfectly circular. Both issues often trace back to fundamental setup and machine alignment problems. A systematic approach to the grinding process is the best way to diagnose and fix these errors. The following steps will help you achieve a true cylindrical form.
Fixing Workpiece Center and Clamping Issues
The foundation of any precise cylindrical grinding operation is the workpiece centers. Flaws in these contact points directly transfer to the finished part.
- Inspect Your Centers: Check the centers on the workpiece, headstock, and tailstock. Look for signs of wear, corrosion, burrs, or debris. Any imperfection will prevent the workpiece from rotating on a true axis.
- Ensure Proper Geometry: The center holes on your workpiece must be perfectly round and clean. An oval or damaged center hole will cause the part to wobble, resulting in an out-of-round condition.
- Verify Clamping Stability: Unstable or inconsistent clamping pressure is another common source of error. The workpiece can shift during grinding if not held securely. This randomness in clamping affects the consistency of roundness from one part to the next.
💡 Pro Tip: Always clean and deburr workpiece centers before mounting. A small chip or piece of grit can be enough to ruin the part’s geometry. Positioning the workpiece correctly is also critical; setting it too low in relation to the machine’s centerline can cause out-of-roundness.
Aligning Your Cylindrical Grinder’s Tailstock
A misaligned tailstock is one of the most frequent causes of taper. If the tailstock axis is not perfectly parallel to the headstock axis, the grinding wheel will remove more material from one end of the part than the other. Following a precise alignment procedure is essential to correct taper and roundness errors.
You will need a high-precision measurement tool, such as a dial gauge or digital indicator, for this task.
- Align the Machine Bed: First, ensure the machine bed or table travels perfectly parallel to the grinding wheelhead’s path. Mount your indicator on a fixture and run it along a known straight edge on the bed to check for deviation.
- Align the Workhead and Tailstock: Once the bed is true, you can align the work-holding components.
- Mount a straight test bar with clean, accurate centers between the headstock and tailstock.
- Place your dial indicator on the machine carriage.
- Run the indicator along the top and side of the test bar.
- Adjust the tailstock until you get a zero reading along the entire length of the bar.
This process ensures the workpiece rotates on an axis that is perfectly parallel to the wheel’s travel, eliminating taper.
Using a Steady Rest to Prevent Deflection
Long, slender workpieces are prone to bending or deflecting under the pressure of the grinding wheel and coolant. This deflection causes the middle of the part to be ground to a smaller diameter than the ends, creating a “waist” or taper. A steady rest provides crucial support to prevent this.
When to Use a Steady Rest:
A good rule of thumb is to use a steady rest when the workpiece’s length-to-diameter (L/D) ratio is greater than 6:1. For parts with an L/D ratio above 12:1, you may need multiple steady rests or other specialized dampening devices.
How to Set Up a Steady Rest:
Improper setup can introduce errors instead of preventing them. Use this method for accurate placement:
- Mount the workpiece between the headstock and tailstock centers.
- Slide the steady rest to its intended position, usually near the middle of the workpiece.
- Place a dial indicator on the carriage, touching the top of the workpiece.
- Carefully adjust the steady rest fingers to support the part without lifting or pushing it. Use the indicator to confirm the part remains perfectly centered as you tighten the fingers.
- Always double-check that the workpiece is secure. Vibration during grinding can cause the part to loosen.
Setting Correct Infeed Rates and Overtravel
Your grinding parameters play a final, critical role. An aggressive infeed rate can increase grinding pressure, causing deflection on less rigid parts. A slow, controlled infeed is always safer.
Equally important is the wheel’s overtravel—how far it moves past the end of the workpiece on each pass.
To prevent a “bellmouth” effect where the ends of the part become oversized, the grinding wheel’s overtravel should be no more than one-quarter of the wheel’s width. Exceeding this allows grinding pressure to drop as the wheel exits the cut, leading to a form of taper at the ends.
By mastering these setup and alignment fundamentals, you can systematically eliminate the root causes of taper and out-of-roundness in your cylindrical grinder. This attention to detail is what separates an acceptable grinding job from a truly precise one.
Resolving Out-of-Roundness Problems
Out-of-roundness, or lobing, occurs when a workpiece is not perfectly circular. This error often stems from instability in the setup or wear in the machine itself. Correcting these issues requires a close look at the workpiece, clamping methods, and the grinder’s mechanical condition.
Regrinding Imperfect Workpiece Centers
The workpiece centers are the axis of rotation for the entire grinding operation. If the center holes are damaged, dirty, or not perfectly round, the part cannot rotate true. An incorrect center height can also cause issues, leading to odd-numbered lobes on the part’s surface. Always inspect and, if necessary, regrind the centers to ensure they provide a perfect, stable axis.
Ensuring Stable and Secure Workpiece Clamping
Proper clamping is critical for achieving good roundness. An insecurely held part can vibrate or shift during grinding. This movement leads to chatter, which appears as a wavy pattern on the surface.
Clamping Pressure is Key Both excessive and insufficient clamping pressure can ruin a part.
- Too much pressure can distort the workpiece, causing poor cylindricity.
- Too little pressure allows the part to move, resulting in inconsistent material removal and poor roundness. The goal is to apply just enough force to hold the part securely without deforming it.
Checking for Worn Machine Components
Over time, machine components wear out. Worn headstock and tailstock spindles or bearings are a major source of instability. This wear introduces vibrations that disrupt the smooth contact needed for precision grinding, often causing lobing.
You can diagnose wear by looking for these signs:
- Unusual noise or vibration during spindle rotation.
- Excessive radial runout, which can be measured with a dial indicator.
- Visible chatter marks on the finished workpiece.
A brief spark-out pass is a simple yet effective technique to improve final part quality. Allowing the wheel to dwell for 1-2 seconds after the final grinding pass helps relieve pressure and correct minor imperfections.
Solving Grinding Wheel and Dressing Issues
The grinding wheel and its preparation are just as important as machine alignment. An incorrect or poorly maintained wheel can introduce errors, even on a perfectly set up machine. Common issues like wheel glazing or loading reduce cutting efficiency and can cause taper and roundness problems.
Selecting the Correct Wheel Specification
Choosing the right wheel is fundamental to precision grinding. A wheel that is too soft for the application will wear unevenly, losing its form and transferring inaccuracies to the workpiece. This premature wear makes it impossible to hold tight tolerances.
At Aimgrind, our expertise lies in matching the wheel to the job. Our conventional bonded abrasives are a reliable solution. Constructed from high-quality aluminum oxide and silicon carbide, they provide the durability needed to maintain form and prevent rapid wear. This stability is key to eliminating taper and roundness errors. We offer personalized selection services to ensure your wheel is perfectly matched to your material, machine, and grinding parameters for optimal performance.
Mastering Wheel Dressing for a True Surface
A wheel must be dressed to be perfectly concentric and sharp. An improperly dressed wheel directly transfers its own geometric flaws onto the workpiece.
Follow these key principles for a true surface:
- Use a Sharp Diamond: A dull or chipped dressing tool cannot create a flat, true wheel face.
- Control Dressing Depth: A shallow pass (e.g., 0.0005 inches) is best for finishing, as it creates a smooth surface. A deeper pass is better for roughing, as it exposes sharper abrasive grains.
- Maintain a Consistent Traverse Rate: A steady, even pass across the wheel face prevents ridges or grooves that would otherwise be copied onto your part.
Maintaining Proper Coolant Application
Coolant does more than just cool; it lubricates the cut and flushes away chips. Insufficient or poorly directed coolant causes thermal distortion, where the workpiece heats and expands unevenly during grinding. This leads to unpredictable size and shape errors. For optimal results, the coolant nozzle should deliver a steady stream of fluid directly into the grinding zone. A good starting point is to match the coolant velocity to the wheel’s surface speed to effectively break the air barrier and cool the part.
To correct taper and roundness errors, always begin with the fundamentals. Verify your workpiece centers and machine alignment. Use steady rests for long parts. Maintain a sharp, true grinding wheel with precise dressing. A systematic, diagnostic approach is the key to identifying the root cause of any cylindrical form error. Mastering these basics transforms the entire grinding process. You will find that you can consistently correct taper and roundness errors, turning challenging cylindrical grinding tasks into a precise and repeatable operation.
FAQ
What is the first thing I should check for taper?
Always check your tailstock alignment first. A misaligned tailstock is the most frequent cause of taper. Use a dial indicator and a test bar to ensure it is perfectly parallel to the headstock axis. This ensures a straight, consistent cut.
When should I use a steady rest?
Use a steady rest to prevent deflection on long, slender parts. A good rule is to use one when the part’s length-to-diameter (L/D) ratio exceeds 6:1. This provides support and prevents taper from forming in the middle of the workpiece.
What is the most common cause of out-of-roundness?
Out-of-roundness, or lobing, often comes from instability. Check for worn headstock or tailstock bearings. Also, ensure workpiece centers are clean and clamping pressure is secure. These issues introduce vibration and disrupt smooth rotation.
Why is a spark-out pass important? 💡
A spark-out pass allows the grinding wheel to dwell without infeed. This brief step relieves grinding pressure and helps correct minor roundness errors. It is a simple way to improve the final surface finish and part geometry.
Contact Us
For More Grinding Solution or Customized Abrasive Tools