You can improve surface finish in grinding by mastering four critical areas. Achieving a high-quality surface depends on your control over these specific elements. This guide offers practical steps to diagnose and solve issues for a smoother final finish.
The Four Pillars of Grinding Excellence:
- The grinding wheel, including advanced options like diamond wheels
- Your process parameters
- The machine setup
- Coolant management
Mastering these parts of the grinding process gives you complete control over your results.
Key Takeaways
- Choose the right grinding wheel. A finer grit size makes the surface smoother. Make sure the wheel is balanced and clean.
- Adjust your grinding settings. Use a faster wheel speed and a slower feed rate. Take shallow cuts and use spark-out passes for a very smooth finish.
- Keep your machine and workpiece steady. Vibrations cause wavy patterns. Secure the workpiece tightly to prevent movement.
- Manage your coolant well. Good coolant flow prevents burning. Clean coolant stops scratches on the surface.
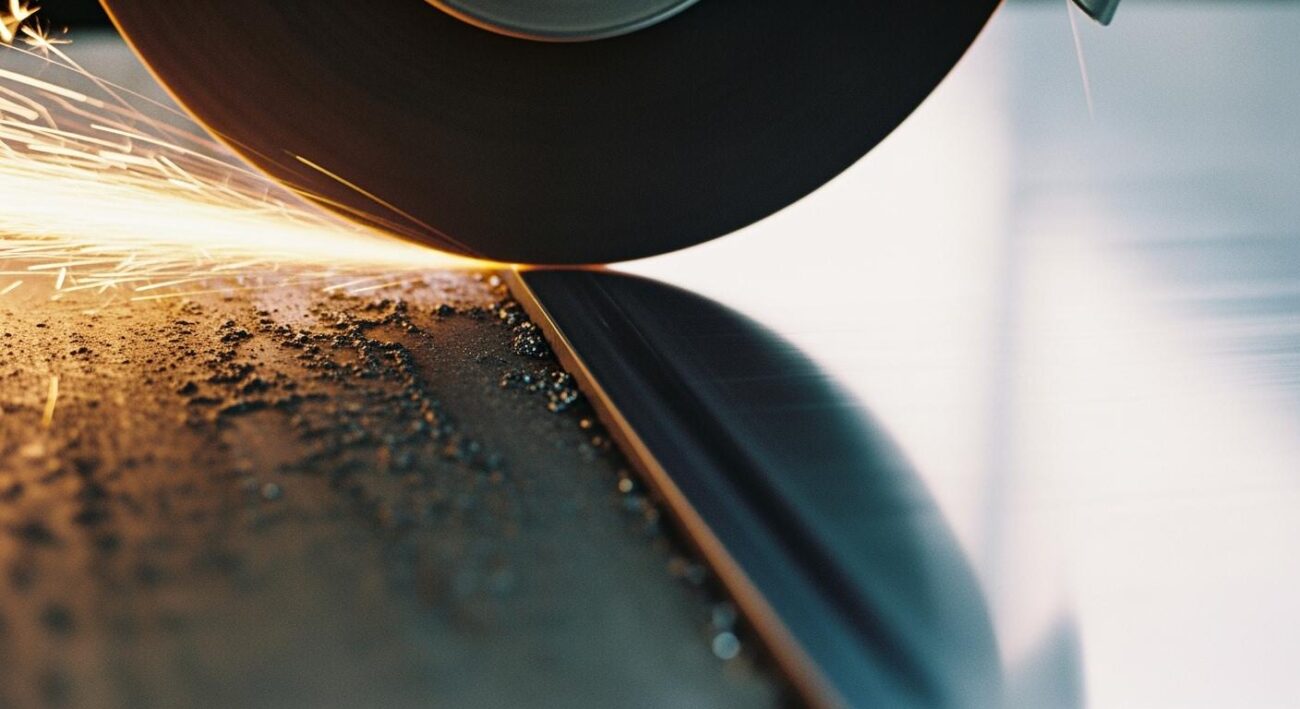
Select the Right Wheel to Improve Surface Finish
Your grinding wheel is the single most important factor for a great finish. The right choice depends on your material, your machine, and your goals. For expert guidance, a specialized provider like Aimgrind offers customized grinding solutions to match your exact needs. Choosing the correct abrasive, grit, and bond type is the first step to improve surface finish.
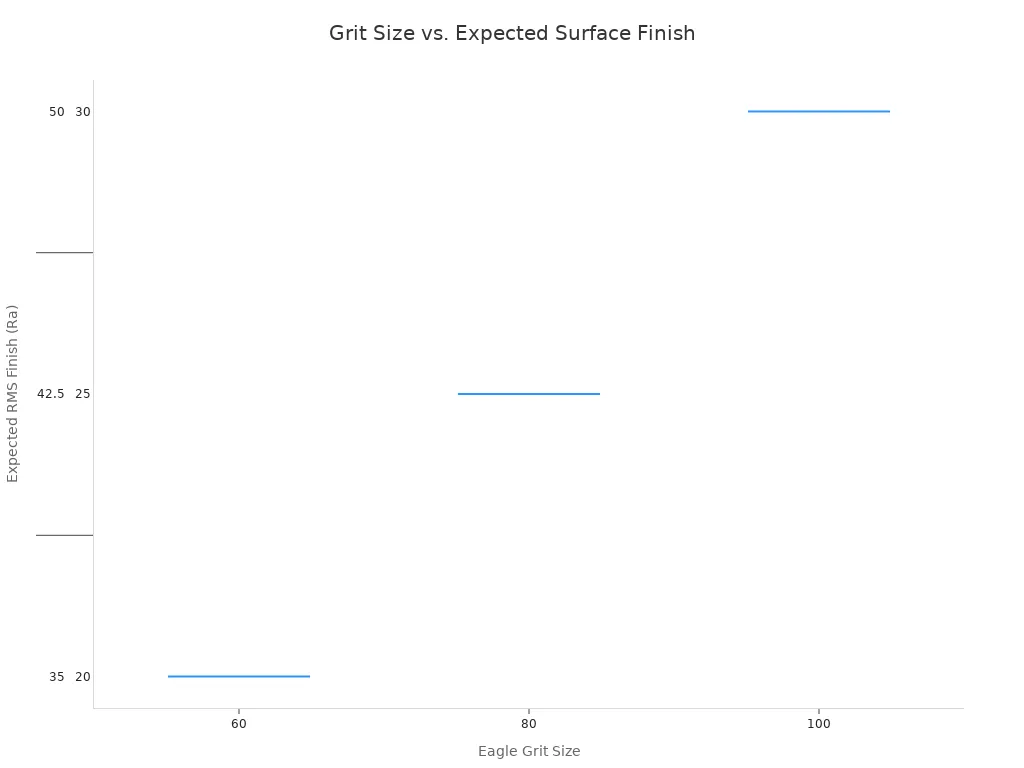
Choose a Finer Grit Size
Grit size directly impacts your surface roughness. Finer abrasive particles (a higher grit number) produce a smoother finish with a lower Ra value. Coarser grits remove material faster but leave a rougher surface.
Tip: For hard materials like ceramics or composites, you need a high-performance grinding wheel. Aimgrind’s diamond grinding wheels offer the durability and precision required for these demanding grinding jobs.
The chart below shows how a higher grit number generally leads to a lower RMS value, indicating a smoother result.
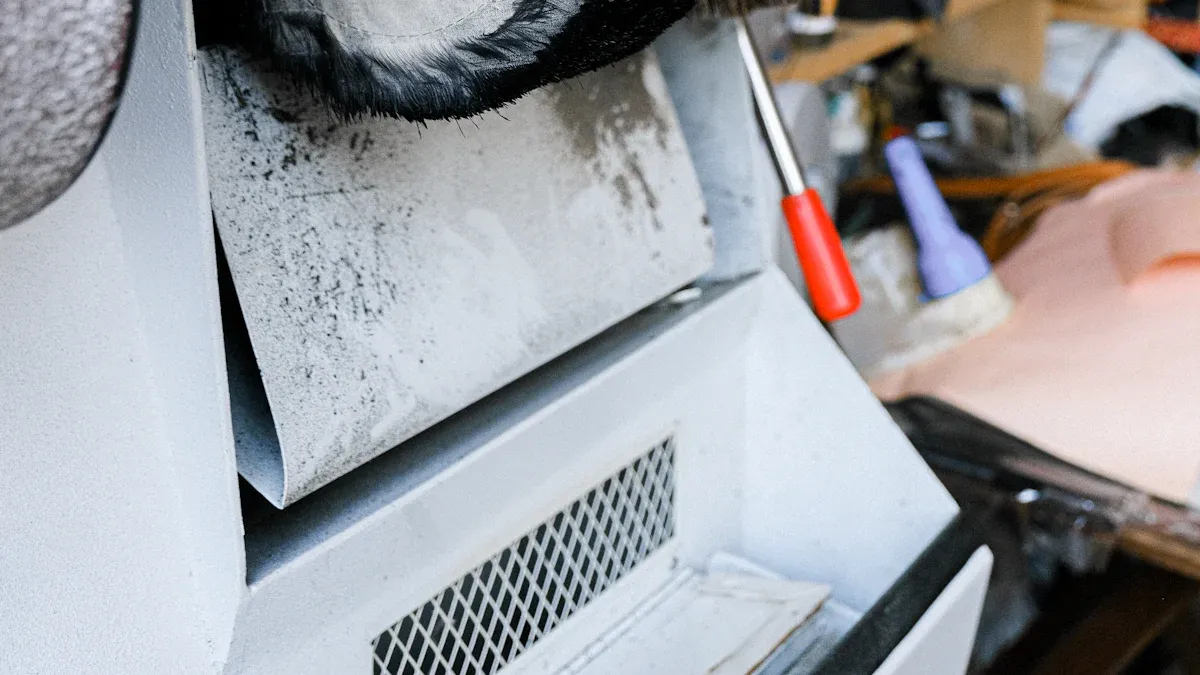
Properly Dress and True the Wheel
A wheel loaded with material or with dull abrasive grains cannot cut effectively. Proper dressing and truing restore the wheel’s cutting surface. If you neglect this step, you risk several problems:
- Poor surface finish
- Chatter marks
- Burning or thermal damage
You should dress the wheel when you notice its cutting ability decrease or see the spark pattern change during grinding. Regular maintenance ensures consistent performance.
Ensure Correct Wheel Balance
An unbalanced grinding wheel creates vibration. This vibration transfers directly to your workpiece, causing waviness and chatter marks that ruin the surface. Even a tiny imbalance can cause the wheel to run out, leading to uneven cutting and visible patterns. You can solve this with two main methods:
- Static Balancing: Best for narrow wheels, this method balances the wheel in a single plane while it is stationary.
- Dynamic Balancing: This more precise method balances the wheel at high speeds, correcting imbalances in two planes.
Proper balancing is essential for any high-precision grinding operation.
Fine-Tune Your Grinding Parameters
Once you have the right grinding wheel, your next step is to dial in the correct settings. Your process parameters—how you use the wheel—are just as critical as the wheel itself. Small adjustments to speed, feed, and depth can transform a good finish into a great one. Finding the optimal parameters for your specific grinding job is key to success.
Optimize Wheel Speed and Feed Rate
The relationship between wheel speed and workpiece feed rate directly impacts your final surface. To improve surface finish, you generally want to use a higher wheel speed and a slower feed rate. This combination allows each abrasive grain on the grinding wheel to take a smaller chip, creating a smoother cut.
Pro Tip: Finding the right speed ratio (wheel speed vs. workpiece speed) is essential. However, be careful. A wheel speed that is too high can make the grinding wheel act “harder,” which increases the risk of thermal damage and grinding burn on your workpiece.
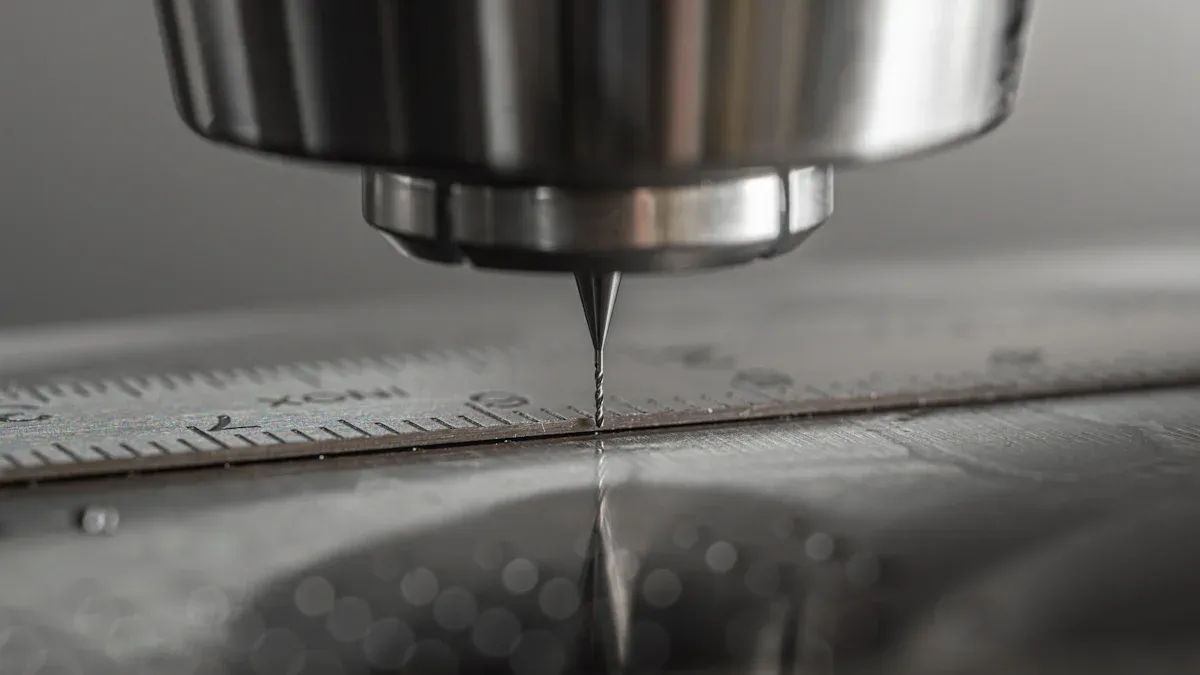
Reduce the Depth of Cut
The depth of cut is how much material you remove in a single pass. For finishing, you must reduce this significantly compared to roughing. A roughing pass removes material quickly, while a finishing pass focuses on precision and smoothness. The final finishing pass might only remove 0.1 mm of material. This shallow cut reduces the force on the workpiece, minimizes residual stress, and is a critical step in achieving a flawless surface.
| Pass Type | Purpose | Depth of Cut |
|---|---|---|
| Roughing | Fast material removal | Deep |
| Finishing | Achieve final dimensions and smooth finish | Shallow |
Use Spark-Out Passes
A spark-out pass is a final grinding pass you make with a zero feed rate. After your last cutting pass, you let the grinding wheel travel across the workpiece one or two more times without advancing it. This simple technique costs you nothing but a few extra seconds.
What does it do?
- It allows the grinding wheel to “clean up” any remaining microscopic high spots.
- It removes spring or deflection from the machine and workpiece.
- It ensures the final surface is as flat and smooth as possible.
For high-precision grinding, always include at least one spark-out pass. It’s the perfect finishing touch for your grinding process.
Stabilize Your Setup to Solve Surface Finish Problems
A perfect grinding wheel and ideal parameters mean nothing if your machine or workpiece is unstable. Vibration and movement during grinding are direct causes of chatter, waviness, and other surface finish problems. You must create a rock-solid foundation for your operation to get a flawless surface.
Eliminate Machine Vibration
Vibration is a primary enemy of precision grinding. It transfers directly from the machine to the workpiece, leaving imperfections on the final surface. You can trace these vibrations back to two main sources.
- Forced Vibration: This exists even when you are not grinding. It comes from sources like unbalanced wheels, worn-out motor bearings, or hydraulic systems.
- Self-Excited Vibration: This type appears only during the grinding process. It happens when machining forces interact with the natural frequencies of your machine or workpiece.
Actionable Tip: You can diagnose vibration issues using tools like handheld vibration meters or accelerometers. For a permanent fix, consider upgrading your machine’s foundation. Materials like polymer composites or specialized isolation pads provide superior damping compared to standard cast iron or steel.
Ensure Workpiece Stability
Your workpiece must remain completely still during the grinding process. Any movement, bending, or flexing will ruin your results. Proper clamping and fixturing are essential to hold the part securely without distorting it. This is how you can improve surface finish and prevent deflection.
To ensure your workpiece is stable, you should:
- Use fixtures made from strong, rigid materials like steel or reinforced composites.
- Employ clamping systems, such as hydraulic or pneumatic clamps, that apply even pressure.
- Add extra supports or brackets for large or thin parts that might bend under pressure.
- Incorporate vibration-damping materials directly into the fixture design.
A secure setup ensures the grinding wheel can do its job correctly, giving you the smooth finish you need.
Manage Your Coolant Effectively
Your coolant does more than just cool the part. It is a critical tool for achieving a great finish. Effective coolant management removes heat to prevent thermal damage and flushes away tiny metal chips (swarf) that can scratch your workpiece. Proper control over your coolant is essential for any precision grinding job.
Ensure Adequate Coolant Flow
Grinding creates a massive amount of heat. Without enough coolant, you risk burning the part and creating residual stress. The flow must be powerful enough to cool the workpiece and clean the wheel.
- Flow Rate: A good rule is 1.5 to 2 gallons per minute (gpm) for each horsepower of your spindle.
- Pressure: A fast-spinning wheel creates a wall of air that deflects fluid. Your coolant needs enough pressure to break through this barrier and reach the cutting zone.
- Nozzle Design: Modern nozzles, sometimes made with 3D printing, deliver a precise, coherent stream of coolant exactly where it’s needed.
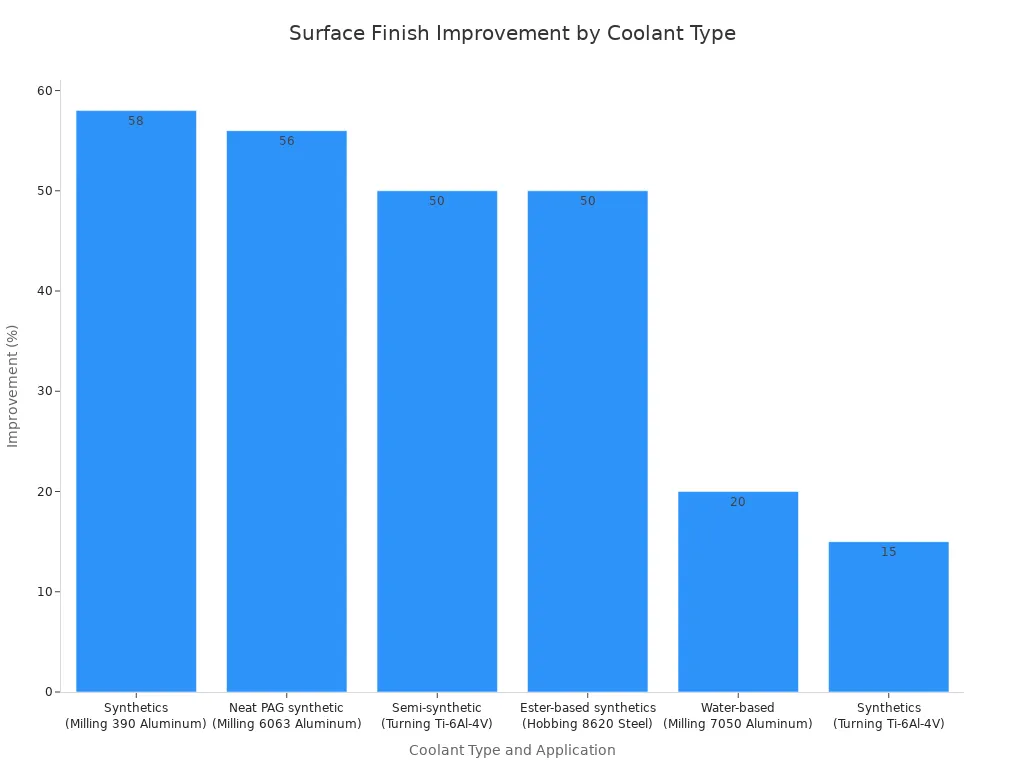
The type of coolant you use also has a major impact. As the chart shows, choosing the right synthetic or water-based fluid for your material can dramatically improve your results.
Maintain Clean, Filtered Coolant
Dirty coolant will ruin your work. Contaminants like tramp oil and swarf get recirculated and dragged across your workpiece, causing scratches and a poor finish. You must keep your coolant clean with a proper filtration system. The right system for your grinding operation depends on your needs.
| Filtration System | Best For | Pros | Cons |
|---|---|---|---|
| Magnetic Separators | Ferrous materials | Low maintenance, no filter media | Only works on magnetic particles |
| Vacuum Filters | High-precision grinding | High filtration efficiency | Higher initial cost |
| Gravity Filters | General purpose | Low operating cost | Larger footprint, less effective |
| Central Systems | High-volume shops | Low labor, consistent quality | High upfront cost, needs space |
Pro Tip: For grinding steel and other iron-based materials, magnetic separators are highly efficient. They pull ferrous particles directly from the fluid without needing expensive filter paper, producing a dry cake of swarf for easy disposal.
You can improve surface finish by mastering four critical parts of the grinding process. A systematic approach to your grinding work is the most effective strategy for consistent results.
The Four Pillars of a Perfect Finish:
- The Right Grinding Wheel
- Fine-Tuned Parameters
- A Stable Setup
- Effective Coolant
Mastering these elements of grinding gives you complete control over the final surface.
FAQ
What is the fastest way to improve my finish?
You should check your grinding wheel first. Dressing the wheel to expose fresh abrasive grains is often the quickest way to solve common surface finish problems. A clean, sharp wheel cuts much better.
Can I use the same wheel for roughing and finishing?
Yes, you can use one wheel for both jobs. You must adjust your process. Use a deep cut for roughing. Then, dress the wheel and use a very shallow cut with spark-out passes for the final finish.
How do I know if my coolant is causing issues?
You can look for scratches on your workpiece. Dirty coolant drags small particles across the surface. You can also check for burn marks. Burns show that the coolant is not cooling the part effectively.
Why does my surface have a wavy pattern?
A wavy pattern usually points to vibration. You should check your wheel balance first. If the wheel is balanced, inspect your machine for worn parts or check that your workpiece is held securely.
See Also
Selecting the Ideal Grinding Wheel Dresser for Your Specific Needs
Optimal Grinding Wheels: A Guide for Your Carbide Tooling
Picking the Perfect Metal Grinding Wheel for Every Project
Finding the Correct Grinding Wheel for Your Stainless Steel Work
Mastering Your Dremel Grinding Wheel: Safe and Effective Techniques